|
|
|
 |
|
|
|
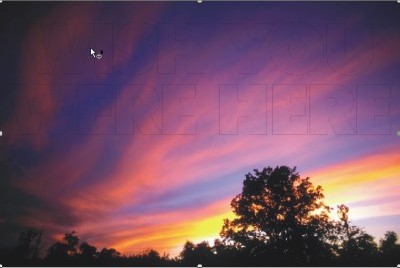
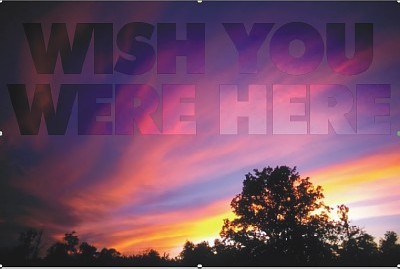
Figure 4. Our image with extra thick text. |
|
|
|
|
3c: Replicating the background.
Now we want to fill the text with the background image. To do this we need to replicate the background image. There are several ways to achieve this but if you have ever wondered how to make the background into an ordinary object then here's how to do it. Normally, actions performed on the background may ruin it's use as a background object later.
- Select the background in the objects docker so that a red border appears around the thumbnail.
- Click Object/Create/From Background and the background becomes a regular object. It is renamed as such in the Object docker.
- Ensure that the background is selected in the Objects Docker then click the Object/Duplicate item from the menu bar. A new object, identical to the background, should be created and placed as the uppermost layer. If we simply duplicated or copied and pasted the background before converting it to an object then the entire image including all the other objects and layers would be copied into the clipboard and back into the Objects Docker. The present result is a new object (layer) above the text that contains only a replicate of the background image.
|
|
|
3d. Clip go the shears boys, clip, clip, clip...
Here comes one of the fun parts; and its so easy.
- Click on the small white space between the eye icon and the thumbnail of the
replicated background object. Now the text on our image reappears
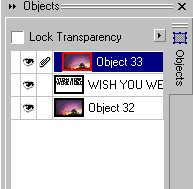
but can be seen only as a thin outline (Figure 5). A small paper clip
appears near the thumbnail on the topmost image in the Objects docker
(Figure 6).
|
|
|
|
|
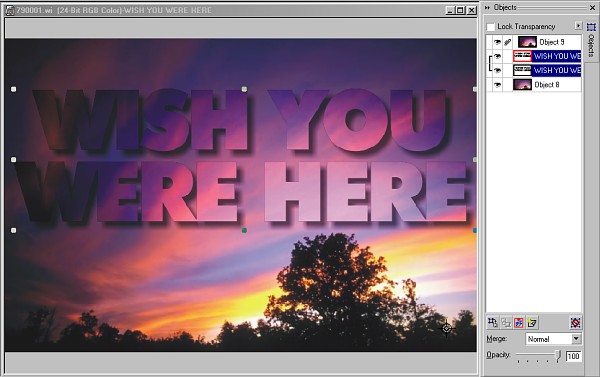
Figure 5. The first clipping step on the replicated background object. |
|
|
|
|
|
Figure 6. View of the current Objects Docker. |
|
|
|
|
|
- Now we need to alter the clipped object a little. Select the thumbnail of the clipped object, then choose Image/ Adjust/ Brightness-Contrast-Intensity from the menu bar. Change the settings to Brightness = -8, Contrast = 32, Intensity = 32, then click OK.
- With the clipped image still selected, move the image 5 pixels up and 5 pixels left using the arrow keys (Figure 7).
|
|
|
 |
|
|
|
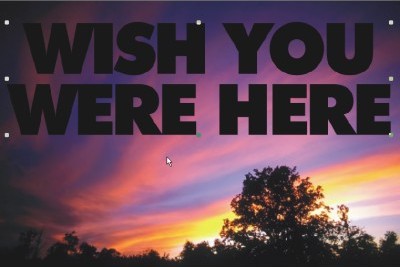
Figure 7. The image-filled text after Brightness-Contrast-Lightness changes and a 5x5 pixel offset. |
|
|
|
|
3e. Shadows in the night.
We are still some way from completion. In order to render the text more 3D-like we need to add a shadow. The shadow cannot be added to the clipped object, but can be created from the original text and then repositioned.
- Select the text in the Objects docker and then deselect the eye icon on the clipped object to render it temporarily invisible.
- Select Object/Drop Shadow from the Menu bar. Make sure that Flat rather than Perspective is selected then change the settings as follows: Direction 315 degrees, offset 0.2 inch, Opacity 65%, colour black, feather width 10 and direction average. Click OK.. The shadow is created and grouped with the original text object.
- Click with the right mouse button on either of the highlighted objects (the text and its shadow) in the objects docker, then choose Ungroup to separate them. Click the lower highlighted object (the shadow) then click the eye icon beside the original text object to render the text invisible. Click on the eye icon beside the clipped object (which should be uppermost) to render it visible again.
- Bingo, now we are starting to get there. Now for some more fun. A clipped object is quite different from a normal object as it inherits its properties from its parent object.
- With the shadow object selected, hold the shift key down and click on the text object in the Objects docker to select both the text and its shadow. Click the right mouse button on the highlighted region then select Group to regroup the objects. The original text object should still be invisible within the group.
- Click anywhere on the image between the white corner blocks and drag the grouped selection to another part of the page. Notice how the fill of the text also appears to move but retains its 5x5 pixel offset regardless of where it ends up. Try placing it near the tree or near the yellow sky. Wonderful, isn't it! The background and the text fill are always aligned. Figure 8 shows my final positioning and the status of the Objects Docker.
|