

|
|
|
|
| Introduction | ||||
| Charcoal | ||||
| Conté Crayon | ||||
| Crayon | ||||
| Cubist | ||||
| Dabble | ||||
| Impressionist | ||||
| Palette Knife | ||||
| Pastels | ||||
| Pen and Ink | ||||
| Pointillist | ||||
| Scraperboard | ||||
| Sketch Pad | ||||
| Watercolour | ||||
| Water Marker | ||||
| Wave Paper | ||||
10. Pointillist.
The Pointillist Art Stroke analyses the main colours of an image and converts them to small dots. You can specify the size of the dots and the amount of light in the image.
Pointillist is quite a simple art stroke. The range of values within the controls don't change the result as dramatically as most of the other art stroke effects. Fine detail is lost in small and medium sized images, but it is not as destructive as others. Black and dark colours are not as affected visually as light and bright colours.
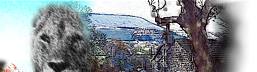
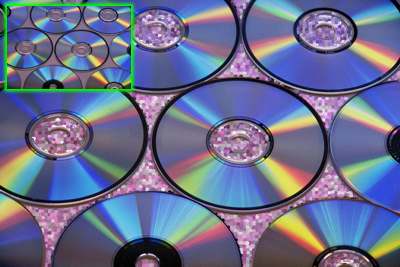
1. Open up your image. Here I have chosen image 686082.JP2 from CD # 4 of the Corel Graphics Suite 11 set. (Fig 1).
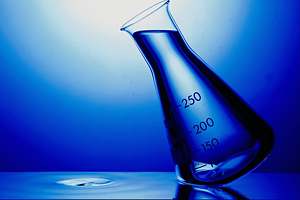
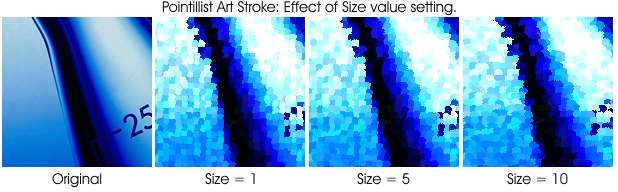
2. Open the Pointillist dialogue box (Effects > Art Strokes > Pointillist). Note that there are only two controls: Size and Brightness. (Fig 2)
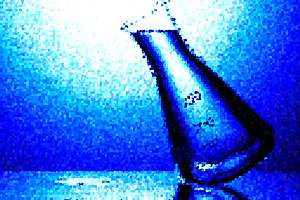
3. Click the Reset button and observe the result. The image becomes randomly pixilated with unevenly shaped blocks. Also, the total numbers of colours within the image is reduced and some image definition is lost. (Fig 3)
4. Adjusting the Size parameter of this effect does not result in as a great a change as similar parameters in other art stroke effects. The different between the lowest value and the highest value is barely noticeable (Fig 4).
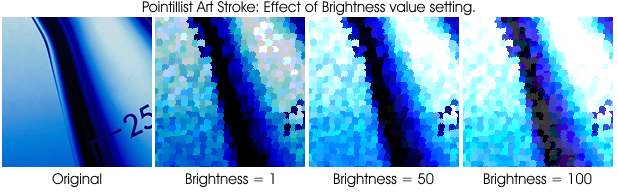
5. Changing the Brightness parameter however does have a significant effect on the result. Increasing values lead to brighter, more vivid and higher contrast images. (Fig 5)
6. Some Examples:
Fig 6.
Background area masked and then Pointillist effect applied. |
 |
|
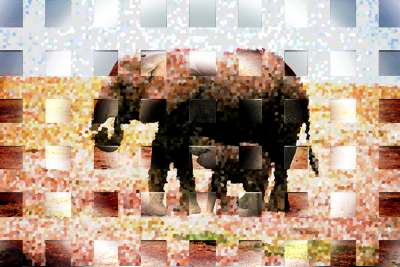
| Fig 7. Image converted to object, New background added and filled with circular texture fill. Original image duplicated. Pointillist effect applied to original and then crosshatch sections erased using a square eraser brush. Mask made from crosshatched object, saved and loaded back in subtractive mode then used to delete sections from the duplicate of the original photo (topmost level). Duplicate shifted 2 pixels left and up. Merge Mode of the original photo changed to Hard Light. |
 |
| « Prev | || | || | Next » |
| - More Tutorials - | - Contact Me - | |
| - Copyright © 2003 David Mutch & Visionary Voyager Corporation P/L - |