

|
|
|
|
| Introduction | ||||
| Charcoal | ||||
| Conté Crayon | ||||
| Crayon | ||||
| Cubist | ||||
| Dabble | ||||
| Impressionist | ||||
| Palette Knife | ||||
| Pastels | ||||
| Pen and Ink | ||||
| Pointillist | ||||
| Scraperboard | ||||
| Sketch Pad | ||||
| Watercolour | ||||
| Water Marker | ||||
| Wave Paper | ||||
8. Pastels.
The Pastels Art Stroke makes an image look like a pastel drawing. You can specify the size and colour variation of the brush strokes.
Pastels is a relatively simple art stroke but it provides some quiet impressive results, giving a very realistic pastels impressionistic transformation to images. Unlike many of the other art strokes, Pastels can be used with images containing fine detail at some of its settings without too much loss. Therefore you should be able to use this effect with most of your photos.
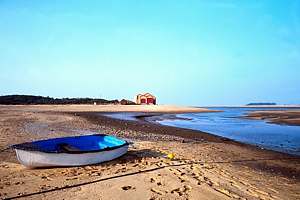
1. Open up a favourite image. For the example here I have used 708043.WI from the PHOTOS/LOCATION folder of CD#3 fro Core Draw Suite 8. (Fig 1)
2. Open the Pastels dialogue box (Effects > Art Strokes > Pastels). Notice there are three controls: Pastel Type, Stroke Size and Hue Variation. (Fig 2).
3. Click the Rest button on the dialogue box and observe the result. Instantly a realistic pastels impression of your image appears. Nice! But it gets even better. (Fig 3)
4. Try changing the Pastel Type from Soft to Oil. Notice that the strokes appear to blend more together with a shinier surface, giving a nice oil pastel appearance. Quite realistic. (Fig 4).
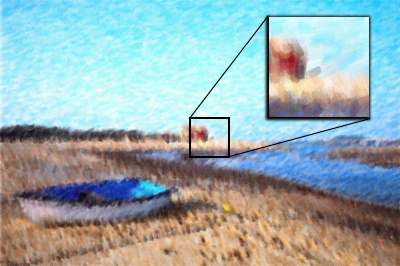
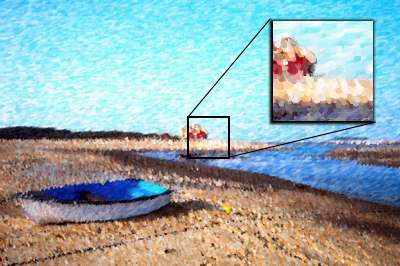
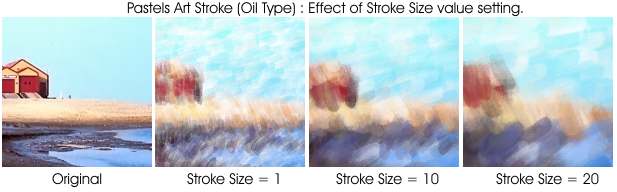
5. Adjusting the Stroke Size to the minimum value of 1 allows for much of the image's detail to be retained while higher settings create larger individual strokes, reduce detail level and also make the image somewhat darker overall. This is more obvious with the Oil pastel type.(Fig 5)
6. The Hue Variation control produces greater colour saturation, greater contrast and also increases the number of added white pastel strokes to the image. In the example shown I have used the Soft pastel type, with a stroke size of 5 (default settings except for Hue variation setting). (Fig 6).

7. Here are some further examples of using the Pastels Art Stroke:
|
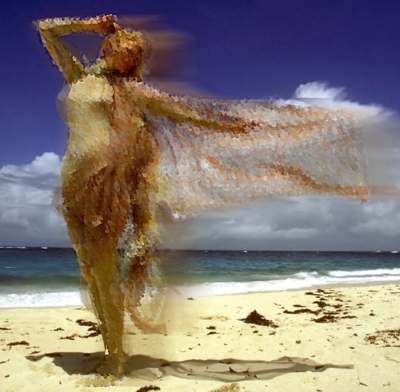
Fig 7. Background duplicated and Soft Pastel effect applied at low stroke size and low hue variation. All sections of the duplicate removed except for the girl and the clock. This object duplicated twice more. On the lowest duplicate (use the Object Docker) a motion Blur is applied and the object shifted so the LH side of the objects align. The second duplicate is left AS IS. On the topmost duplicate a Ripple distortion is applied and the opacity of this object reduced to 50%. |
 |
|
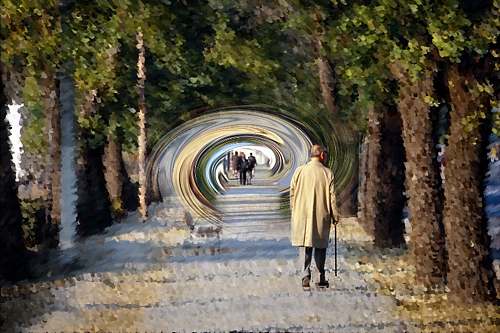
Fig 8. Image duplicated then Pastels effect applied to duplicate. An oval mask with lots of feather created at the centre of the image and then that section removed. Use the mask to create a copy of that section from the original and place the new object on top. Distort with a Twist distortion. Use the eraser tool to uncover the original walking man and the people and pathway down the centre. |
 |
| « Prev | || | || | Next » |
| - More Tutorials - | - Contact Me - | |
| - Copyright © 2003 David Mutch & Visionary Voyager Corporation P/L - |