
How to use the FRAME EFFECT in Corel Photo-Paint (versions 9+).
Part C. Applying Frames to separate floating objects.
As well as 'flat' (single object, background) images, you can also apply Frame effects to floating objects. This is especially useful in constructing multi photo compilations and montages in a single image.
You can also create some great effects with and between objects, making them appear to merge and blend in interesting ways.
Lets make an easy photo composition first.
1.Open your images.
Open three of your favourite photos in Photo-Paint ( or CTRL+O).
Here I'm using images, all from the photos/animals/birds folder of Corel Draw Suite 10, CD#3:
624088.WI,
815000.WI and
816017.WI.
The images will be too big to use for this exercise but for your own creations later you can use images of any size.
For this exercise, resample the images ( ) to about half their original size, about 500 pixels wide for landscape images and about 650 pixels high for portrait images.
This not really necessary but it makes it a bit easier for this exercise, especially for those with older/slower computers or limiting amounts of RAM.
In real life you may want to use larger images to retain the quality when printing.
2. Create a new image.
()
which is about 2.5 times wider and 1.5 times higher that your photos.
Mine is 1150 pixels wide x 800 pixels high. This will be the composite image we place the other images into.
3. All the eggs in one basket - set up the composite image.
Now select each of the photos in turn and COPY then PASTE them into the blank composite image.
Position them as in Fig 11.
You may delete the originals now if you wish to or if you only have limited RAM.
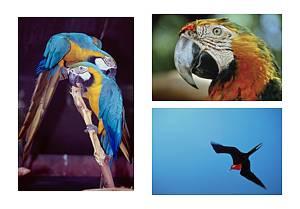 |
Fig 11. |
Alternatively, you could have IMPORTED the photos into your composite image, but then you would need to resize each of them within the composite image to suit. Either way is fine.
4. Apply the first FRAME Effect.
Select one of your floating object photos within the composition,
then open the Frame effect dialogue ().
Click the RESET button on the dialogue box if necessary to clear any previous settings then choose a frame that you like.
Switch to the Modify tab of the Frame dialogue box.
Notice that now both the Color and the Blend options are grayed out!. You cannot use these features when applying frames to floating objects. But all the other options are enabled.
Make any changes to the frame you like then press OK.
5. Apply FRAME Effects to the other images.
Similarly, select each of the other floating photo objects and apply your favourite Frame effects.
When done, your image should look something like Fig 12.
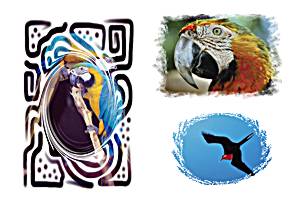 |
Fig 12. |
6.
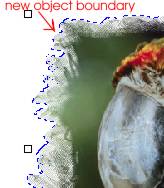 Changed
Object Boundaries.
Choose the Object Picker Tool ![]() and turn on the Object Marquee Visibility (CTRL+SHIFT+H)
if it isn't already visible.
and turn on the Object Marquee Visibility (CTRL+SHIFT+H)
if it isn't already visible.
Select the different photo objects in turn.
Note how each object's boundary has now been changed by the use of the Frame effect - each object's boundary is now defined by the frame effect, rather than the rectangular shape of the original photo.
This means that the area outside this boundary is now transparent and can be feathered and blended with other, underlying objects.
Turn off the Object marquee visibility now as it can get a bit distracting (CTRL+SHIFT+H - a toggle).
7. Fill the Background.
Now select the background object with the Object Picker tool
(either click on the white background or use your Objects Docker to select it).
Fill the background with your favourite Texture or Bitmap Tile Fill.
You can use the Fill (bucket) Tool ![]() , or from the menu. (Fig 14)
, or from the menu. (Fig 14)
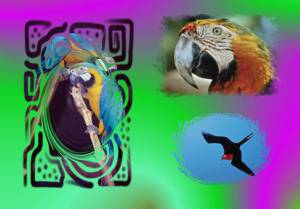 |
Fig 14. |
8. Apply a FRAME to the entire background.
With the background still selected, apply a Frame effect to it. (Fig 15)
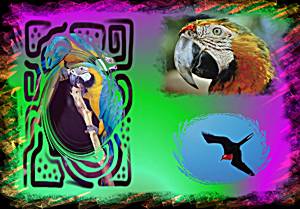 |
Fig 15. |
Reposition each of the floating photo objects so they are a little closer to each other and then add a drop shadow to each.
9. Final touches.
To add a little more effect to the border area,
select the background again, then create a mask that surrounds the entire image ( or CTRL+A).
Reduce the mask by 50 pixels ( , or in version 11).
Then invert the mask ( or CTRL+SHIFT+I).
If the mask Marquee is visible (CTRL+H) or the Mask Overlay is turned on you will see a border shaped mask around the entire image.
Apply a strong Emboss Effect using original colours () ,
then increase the Brightness/Contrast/Intensity quite strongly ).
With the background still selected and the mask in place, COPY, then PASTE the masked area of the background to a new object.
Add a drop shadow (SW direction) to this new object to give the border some depth.
This completes your tutorial photo composition. (Fig 16)
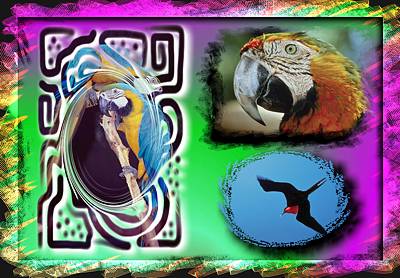 |
Fig 16. |
This concludes Part C of the Tutorial.
In Part D you will learn how to create your own Frames files.
| Fun With Photos #2 | |||||||||
| Intro | Simple Borders | Frame Effects | Multi Photo | Picture Frames | |||||
| Series Intro | Polaroids | Intro, Single Frame, background object | Multi frame, background object | Frames with floating objects | Create your own Frame | Photo Displays | Basic Picture Frame | Enhanced Picture Frame | |
| « Prev | || | || | Next » |
| - More Tutorials - | - Contact Me - | |
| - Copyright © 2003 David Mutch & Visionary Voyager Corporation P/L - |