 OK,
Lets make our own FRAME.
How to use the FRAME EFFECT in Corel Photo-Paint (versions 9+).
Part D. Creating your own Frames.
As noted previously, a Frames file is a standard Corel Photo-Paint format (.CPT) image. (More on this at the end of this tutorial!)
This means that you can not only load and edit frames files as normal images, you can also create your own very easily.
Lets have a look at some Frames files.
Analysis of a Frame file.
1. Open a Frames File.
Click in Photo-Paint and navigate to your frames folder (see here for the locations).
Open up three of four frames files directly into Photo-Paint, not via the Frame Effects dialogue box.
2. Document Properties.
For each image you opened look at the document's information/properties (, or click the info icon on the toolbar if you placed it there as I have).
You should note the following:
- each file is 3000 pixels High by 3000 pixels wide
- the resolution (both Horizontally and Vertically) is 300 dpi
- the colour mode (type) is 8-bit grayscale
- some of the frames files have guidelines (e.g. lightning.cpt)
- in almost all cases, the center region of the image is white while the outside is black.
Looks simple enough. So, as long as we stick to these specifications, we can make our own Frame files.
The fact that some files have guidelines and others do not means that the guidelines themselves are not important to the function of the frame, they are simply left over from when the developer made the original frame and Photo-Paint ignores them when used as a Frame file.
The white centre and black edge, and the fact that these files are 8-bit grayscale give us a clue as to how the frame actually works. Transparency and masks also work in an 8-bit grayscale mode and both of these work by using 100% white areas as fully transparent and 100% black areas as fully opaque. Grayscale values between these two extremes are varying regions of transparency. Therefore our frame file is acting very much like a grayscale mask.
Interestingly, a Frame file does not even need to be a CPT file as I discovered during some experimenting. Later on, try using other 8-bit grayscale file formats as frame files and see what happens!
 OK,
Lets make our own FRAME.
1. Starting point.
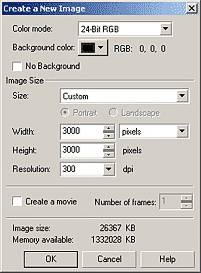
Create a new image in Photo-Paint:
Background Colour = 100% Black
Units = Pixels
Height = 3000 pixels
Width = 3000 pixels,
Resolution = 300 dpi,
 Add
some guidelines and set up the Zoom.
To make it easier we will add some guidelines.
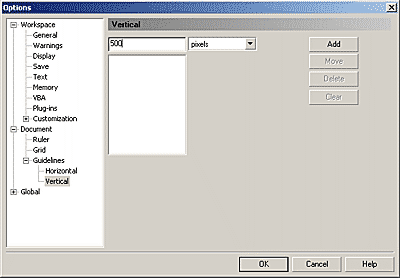
To add guidelines, from the menu choose to display the Options dialogue box.
Then open the tree and select Horizontal in the LHS panel. (Fig frames-17b)
In the text entry box in the RHS panel, type in 500 then click Add.
Type in 2500 and click Add.
The two horizontal guides will be added to the list and you should also see them appear in your image in the workspace.
Click on Vertical in the tree in the LHS panel to display the vertical guidelines.
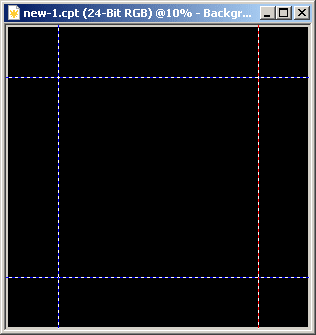 Type
500 into the text entry box then click Add.
Type 2500 and click Add.
Click OK on the Options box to close it.
You should now have a large black square image with four guidelines on it. (Fig frames-18).
In this example we want to create a feathered inner white area which will allow our photograph to show through when we use this file as a frame.
We need to create a feathered mask to do this.
First, turn on Snap to Guidelines ( or use the CTRL+SHIFT +Y toggle).
For the next step we need to set the Zoom level to 100%. Also, adjust your scroll bars so you can see the intersection of the top and left guidelines.
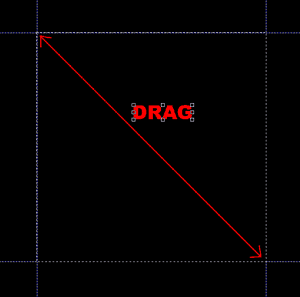 Creating
the mask.
Select the rectangular Mask Tool, then drag a rectangular mask from just inside the top left corner where the guidelines intersect to just inside the intersection of the bottom right corner of the guides.
You will need to drag past the bottom right corner of the image visible onscreen due to its size, allowing it to pan, and the possibly drag back again until you reach the intersection of the bottom and right guides before releasing your mouse button.
It is best to do it this way because Photo-Paint's snapping distance is quite small and if we do this on a reduced zoom image of this size, it is very difficult to ensure we have snapped the mask correctly to the guidelines. (Fig frames-19)
Now that we have snapped the mask to the guidelines, we need to be able to see all of the image at once for the remainder of the exercise.
Start by setting the Zoom level to about 10%, then, drag the bottom corner of the image window so that it takes up most of your workspace.
Now choose 'To Fit' from the Zoom drop down list on the Toolbar.
The image will expand to fill the gray space, reshaping the window to fit and removing all the scroll bars.
4. Feather the mask.
(, or in vers 11):
Width 300 pixels,
Direction = Average. (Fig 20)
Choose white as the Fill colour
(right-click on the white colour swatch in the palette)
then click in the center of the image with the Fill tool to fill the feathered unmasked area with white.
White regions of the Frame will be transparent areas in which the image we apply the frame to will show through.
6. Invert the mask.
( or CTRL+SHIFT+I)
7. Painting heavy white brush strokes.
This will create a 'hairy' region outside the square feathered central region. The image will show through the 'hairs'.
Left-click on the white palette swatch to change the Paint colour to white.
Select the Brush Tool from the Toolbox, then change the settings on the Property Bar to:
- Brush = Art Brush and
- Brush Type = Speed Lines (from the drop down list),
- Size (Nib Size) = 60,
- Transparency = 50
(press ENTER after the last Property bar change to force the changes if necessary).
Starting from the center of the image,
brush wavy lines outwards towards the edges,
going all the way around the image so it turns out looking like a hairy cube.
(Fig 21).
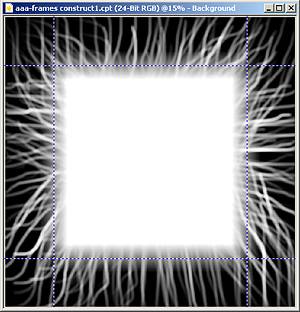 |
Fig 21. |
Change the Nib Size to 30 (use the Property Bar).
Draw wavy brush strokes from just inside the mask to the outside edge all the way around (Fig 22)
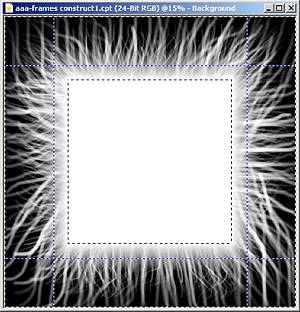 |
Fig 22. |
The Frame still looks a little stark, lacking in complexity.
Lets add some black brush strokes further in towards the centre.
Remember, the black/dark coloured regions in the Frame will be opaque, frame-coloured areas.
Remove the mask ( or CTRL+R)
Change the Paint colour to Black. The Nib Size should still be set to 30.
This time we are going to add thin wavy black strokes to ease the strong white edge we have around the middle.
Make wiggly black brush strokes from about half way between the guide corners and the corners of the image brushing in towards the centre of the image.
After brushing each corner, carefully brush more wiggly strokes from the sides inwards until you achieve an image like that shown in Figure 23.
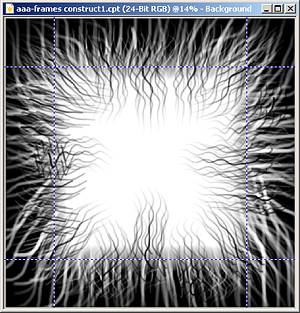 |
Fig 23. |
You should still only have one object in your image - the background.
If not combine all objects ( or CTRL+SHIFT+DnArrow)
10. Convert the Colour Mode and Save.
Convert the image to 8-Bit grayscale
( or in Photo-Paint version 11).
Save the image in your frames folder as MyFrame1.cpt, then try it on a photo.
In the example shown in Figure 24, I have used the same frame twice, one cyan and one black with one of them offset (Align button) from the other slightly.
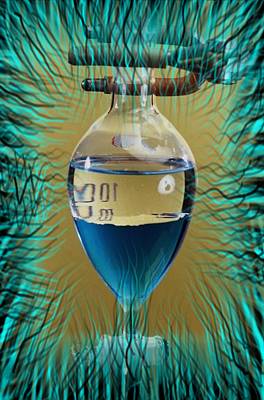 |
Fig 24. |
11. Film Frame.
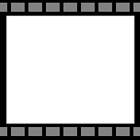
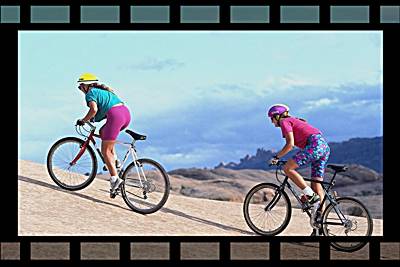
Another good type of frame to make is a Movie Film Frame - see if you can make it. (Figs 25 26).
 |
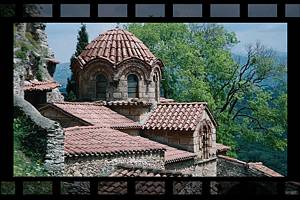 |
| Fig 25a. | Fig 25b. |
 |
|
| Fig 26. | |
Interestingly, during my exploration into Photo-Paint's FRAME Effect to write this set of tutorials, I discovered that Frames files can also be other file types, not only CPT files, including 24-bit file types. Why not try some experimenting for yourself and see what other types of file formats you can use as Frames.
This concludes our expedition into Frames Land.
I hope that you will now be able to make some really cool frames for yourself, and use them in interesting and innovative ways.
| Fun With Photos #2 | |||||||||
| Intro | Simple Borders | Frame Effects | Multi Photo | Picture Frames | |||||
| Series Intro | Polaroids | Intro, Single Frame, background object | Multi frame, background object | Frames with floating objects | Create your own Frame | Photo Displays | Basic Picture Frame | Enhanced Picture Frame | |
| « Prev | || | || | Next » |
| - More Tutorials - | - Contact Me - | |
| - Copyright © 2003 David Mutch & Visionary Voyager Corporation P/L - |