
Creating Multi-Photo Image Frames in Corel Photo-Paint, versions 8+
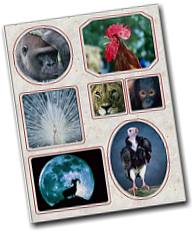 I'm
sure you have seen those great photo frames you can buy at Kmart and Kodak labs
- those with several different shaped cut-outs you can place your photos behind
and the hang on the wall. I have one that doubles as a key box!
Well here's a way to make them using Corel Photo-Paint.
I will show you how to make them using two different methods to create the cut-out areas. The first uses objects and shapes, while the second uses clip masks. Both methods are as good as each other, and both allow you to reposition the cutouts later if you need to.
 Create
a new image
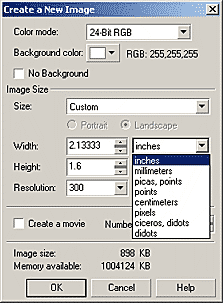
Create the image big enough to hold several photos ().
I suggest you create a Letter or A4-sized RGB image at 300 dpi with a white background.
Photo-Paint has a number of handy preset document sizes available from the Create a New Image dialogue box. These are all grouped according to the type of measurement units you choose.
For instance, if you choose 'inches' as the units, several common US and empirical sizes (such as Letter and Legal) are the available in the preset Size drop down list.
If you choose millimetres as the units, preset sizes such as A3, A4 and A5 are available in the Size list.
If you choose pixels as the units, common screen sizes such as 640x480, 1024x768 and 800x600 are available.
2. Preparing to draw the shapes.
Choose Black as your Paint colour, for shape outlines (left-click on the Colour Palette)
and choose 50% black as your Fill colour (right-click on the Colour Palette).
Choose one of Photo-Paint's predefined Shape Tools: the Rectangle Tool (F6) , Oval (F7) or Polygon Tool (Y).
For each tool, use the Property Bar to:
3.Draw shapes on your image.
The shapes will act as cut-outs that we place the photographs beneath. The shapes should be a little smaller than the size of the photos you use, or large enough to surround a section of a photo, such as a face.
Using the Rectangle, Oval, Polygon and Line Tools, draw shapes on your image, corresponding with the number and size of the photos you wish to use.
SHAPE TIPS:
4. Align the shapes using the alignment control.
Align the shapes according to your design plan.
The top, bottom, left and right edges of the outer shapes are usually best aligned parallel to the edge of the image allowing for sufficient white space between the image edge and between each cut-out shape.
ALIGN TIPS:
5. Multi-photo frame samples.
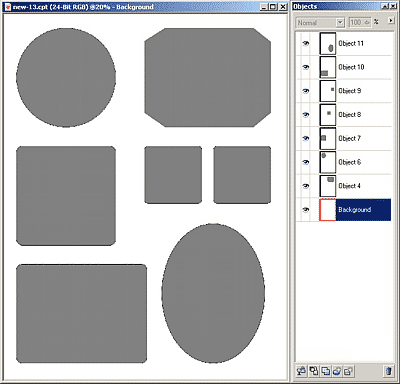
When complete, you should have a white background object and several shape objects.
Here are some example multi-photo frames I made:
 |
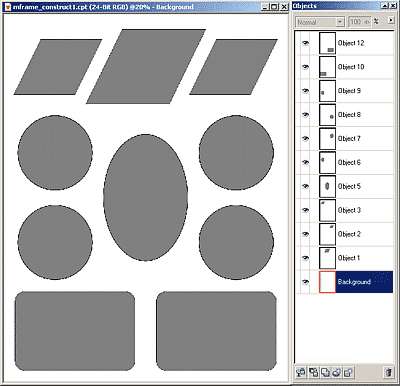 |
Examples of some
Multi-Photo frames. |
These shapes will be used to create a duplicated single object of the combined shapes. We retain the original group in case we need it later.
6. Create a single object from duplicates of the shapes.
Open your Objects Docker if it isn't already open (CTRL+F7).
SHIFT+Click to select all of the shape objects (but not the background).
Group them together ( or CTRL+G).
Duplicate the group ( or CTRL+D). The duplicated group should now be selected. If not, select it.
Combine all of the duplicated group objects together ( or CTRL+ALT+ DnArrow).
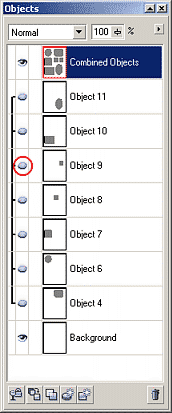 Rename
this object 'Combined Objects' by double-clicking on its name
in the Object Docker.
Now you have two sets of the objects - one object containing the combined result of all of them and a group of all the separated objects.
7. Make the backup group invisible.
Click any one of the Visibility 'eye' icons from members of the group of original objects to render the entire group invisible (Fig 4)
We will be using the combined object as a base for the cutout to hide the edges of the photos beneath it.
The invisible grouped object is retained in case we wish to reposition, resize or change any of the shapes at a later date, providing us with an editable multi-photo frame.
Save the file in native Photo-Paint format (.cpt) to retain all separate objects.
8.Creating the cut-out card (matboard).
The object containing the combined shapes becomes the card which covers our photos.
But at present it contains multiple objects instead of the CUTOUTS of these objects.
It needs a few enhancements first though to make it look better.
Create a Mask from the Combined Objects object. ( or CTRL+M)
Delete the Combined Objects object using the Trash Can in the Object Docker.
Create a new object () and rename it 'Cutout Card'.
Invert the mask ( or CTRL+SHIFT+I)
9. Fill the object with a paper Bitmap fill.
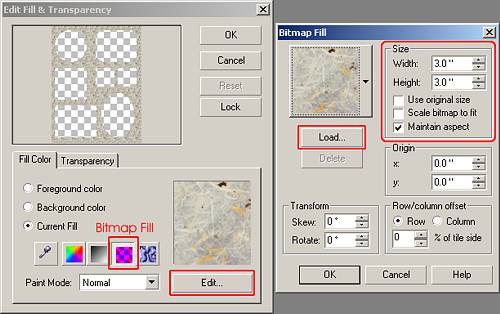
Use then click the Bitmap Fill icon and press the Edit button.
In the Bitmap Fill dialogue box click the Load button. Navigate to the Tiles\Paper folder on CD#3 of your Corel Draw suite and preview the paper tiles there.
I have chosen RICEPAPE.CPT.
Since the image we are working on is so big, I also changed the size of the tile.
To do this, uncheck Use Original Size in the Size section of the Bitmap Fill dialogue box, check Maintain Aspect, then change the Width or Height value.
I used a value of 3 inches.
 |
| Fig 5. |
I found this paper card texture to be a bit too dark, so I lightened it using , changing the Lightness value to +50.
If you have the Mask Overlay turned on your image should now look like this:
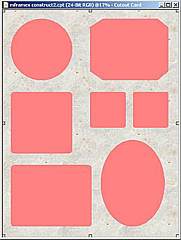
Fig 6
10. Create an embossed effect on the cutout surrounds.
If we apply an embossed effect outright to the entire image it makes the paper
texture quite ugly. Therefore we need to restrict it only to the region just
past each of the cutouts. We can do this with a mask.
Invert the mask (CTRL+SHIFT+I) so the cutouts are now unprotected.
 Expand
the mask by 10 pixels (orin version 11).
Apply an Emboss effect () at these settings:
Depth = 10
Level = 300
Direction = 45
Emboss Colour = gray
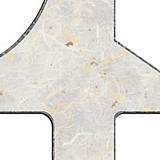
If you zoom into your image you should see a nice embossed edge around each cutout. (Fig 7)
11. Add a thin line border to the cutout surrounds.
Once again, expand the mask, but this time to 30 pixels.
Change the Paint colour to a dark red-brown colour.
Select the Paint Brush Tool, then choose the Art Brush and the Small Hard brush type from the drop down list.
The Property Bar settings should be solid round Nib Shape, Nib Size = 10, Anti-Aliasing = on, Feather = 25.
Stroke the Mask with the brushstroke.
This is done slightly differently in different versions of Photo-Paint:
In version 8: Use
In version 9: Use the Stroke Mask icon on the Property Bar when a Brush Tool is selected.
In version 10:Use the Stroke Mask icon on the Property Bar when a Brush Tool is selected.
In version 11: Use
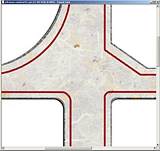 Choose
Middle of Mask border, then press OK.
You will now have a far red highlight line surrounding each of the cutouts.
Zoom in to see the result more clearly then zoom back again to your previous zoom setting so you can see the entire image without scroll bars. (Fig 8)
Remove the mask ( or CTRL+R)
Save the image in CPT format again at this stage.
12. Adding the first photograph.
The photographs need to sit behind the cutout card.
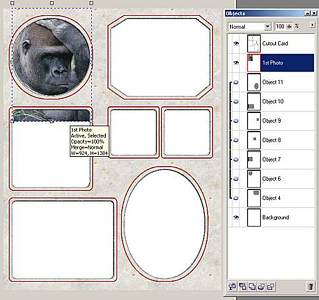 In
some cases you may wish to show only part of a photo, for instance just someone's
face rather than the entire picture with it's background and/or other people.
Therefore each photo needs to be sized and placed correctly to suit your own requirements. Choose your images and decide which part of the image will be displayed according to each of the cutouts yo have created. Some are more suited to facial portraits while other cutouts are more suited to full landscape pictures. We will add the photos using the Import command.
Use or the Import icon on the Standard Toolbar or CTRL+I.
Navigate to your images collection, select an image, then click the Import button on the dialogue box.
In Photo-Paint, drag the shape of the photo over your chosen cutout so that the photo, or the section of the photo will be sized and positioned moderately well in relation to the cutout shape.
Using your Objects Docker, drag the photo object to below the Cutout Card object. (Fig 9)
The photo should still be selected so you can make final adjustments to its size and position using the Object Picker Tool.
13. Add more photos.
Continue importing photos, dragging to size as each is imported, then place them beneath the Cutout Card object.
I also rename them at this stage so I can easily tell which one is which.
Notes:
a.) You may need to APPLY changes to images after resizing before you ca continue
to work in Photo-Paint. The easiest way to do this is to simply double-click
inside a changed object, or right-click and choose 'Apply'.
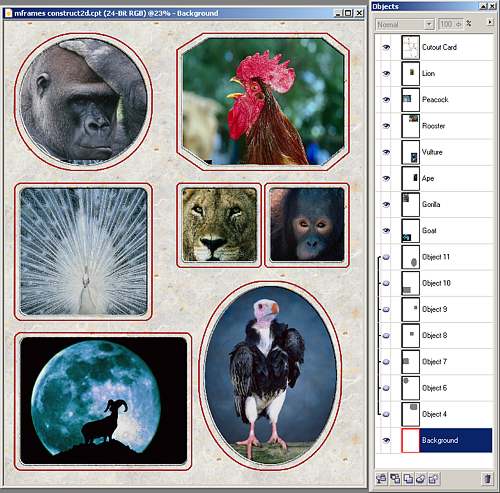
b). Some images may overlay other images and appear within the adjacent image's cutout. To resolve this, simply change the position/level of the image within the Object Docker sequence so the offending image is below the other. Alternatively, you can use the Eraser Tool to erase away an unneeded part of an image that imposes on another. There are also other ways to do this if you think about it.
You should end up with something like this: (Fig 10)
 |
| Fig 10. |
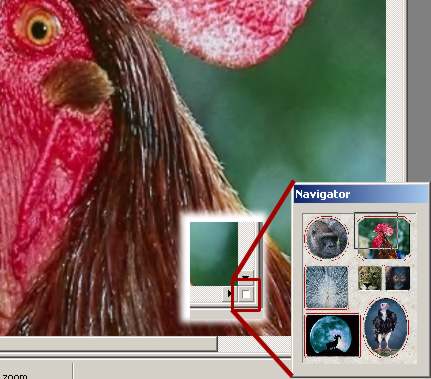
To check the final quality of your composition, change the Zoom level to 100%, then use the Navigator at the far bottom right of the image to pan through the whole image (Fig 11).
 |
| Fig 11. |
When you are satisfied, reset the Zoom and window size so you can see all of the image at once in your workspace.
That completes this tutorial on making a multi-photo image frame.
14. Further enhancement.
To enhance your creation further,
I suggest you now continue on and complete the next tutorial as well - How to
Create a Realistic Picture Frame for your entire composition.
 |
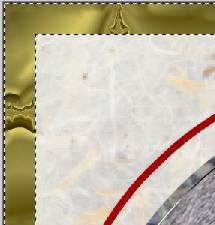 |
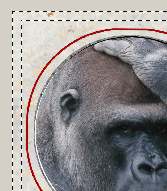
| Some of the details of the image with a border being created. (RHS shows a metallic border) | |
| Fun With Photos #2 | |||||||||
| Intro | Simple Borders | Frame Effects | Multi Photo | Picture Frames | |||||
| Series Intro | Polaroids | Intro, Single Frame, background object | Multi frame, background object | Frames with floating objects | Create your own Frame | Photo Displays | Basic Picture Frame | Enhanced Picture Frame | |
| « Prev | || | || | Next » |
| - More Tutorials - | - Contact Me - | |
| - Copyright © 2003 David Mutch & Visionary Voyager Corporation P/L - |