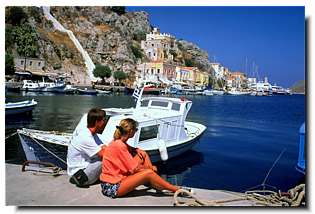

Creating Simple Photo Borders using Corel Photo-Paint.
Here are some easy techniques to make your digital images look like those straight out of a 1970s photo processing lab or from a Polaroid camera. These easy tutorials can be created using Corel Photo-Paint version 8 and higher.
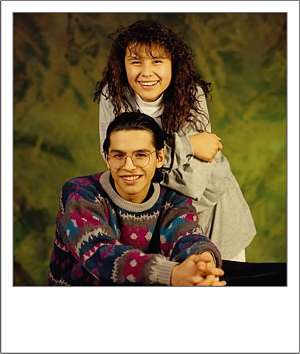
Old style ordinary (Kodak) photos used to always come with a white border around them. But these days, most photos are borderless.
This technique is a quick and easy way to add a white border to your photos.
This technique works best with images that have a full colour background.
1. Open up your favourite happy snap in Corel Photo-Paint.
( or CTRL+O)

2. 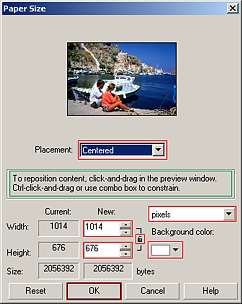 Change
the Paper Size.
Open up the dialogue box.
Make sure the Background colour swatch in the dialogue box is set to White.
If you wish, change the units type to your preference using the units drop down list.
Next, adjust the values in the New Width and New Height input
spinner boxes.
You need to add about 0.2 inches, or 6mm, or about 40 pixels to each of these.
Lets have a look at some of the options available to you in this feature of Photo-Paint:
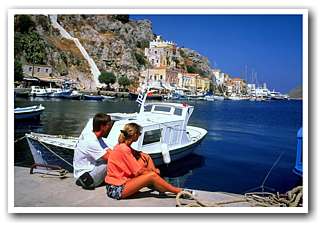 Thus
for your needs here, where we want and equal increase in both height and width
paper values, we need to have the lock turned OFF.
For our Kodak-style photo:
Press the Reset button to reset any changes you just made while examining the settings.
Make sure the proportional lock is OFF.
Increase both the New Width and the New Height settings by approximately 0.2 inches, or 6 mm, or about 50 pixels each.
Press OK when ready.
The current image should still be only a single object - the background.
Now you have a nice even white border around your photograph.
See, I told you it was quick and easy!.
3. Displaying your Kodak-type images (adding a drop shadow).
You cannot add a drop shadow to the background object. So the background must first be converted into a floating object and a new background created. These are both described in more detail for the Polaroid image below.
The example shown above needed four additional steps:
- Create an object from the background (). Now we have a floating object with no background.
- Create a background. First make sure that the Paper colour is set to white by CTRL+Left Click on the white colour swatch on the colour palette. Then create a new background using . A new background object us created. You will see this if your Object Docker is open (CTRL+F7).
- Once again, adjust the paper size so that it is about 20% larger than the photo with its white border. Placement should Centered. ()
- Select the image object and add a drop shadow using the Drop Shadow Tool
.
Your image should now look the one above, and when placed on a white background such as this page, the edge of the photo will appear to be the drop shadow.
Photographs of this type are simply cut from the same sheet of photographic paper. So there is no need to create a false edge where the image meets the border.
But that does happen with Polaroids though, which have a paper border stuck on top of the actual photograph.
Polaroid photographs are square pictures inside a rectangular frame which has more white space at the bottom than the top, and evenly sized borders on the left, top and right hand sides.
1. Open your favourite photo in Photo-Paint.
Here I've used 702006.WI from the PHOTOS/COUPLSII folder of CD#3 from CorelDRAW 8 Suite.

2. Crop the image square.
Select the Crop Tool .
Hold down both the SHIFT+CTRL keys together and then click and drag a crop marquee from the centre of your photo outwards.
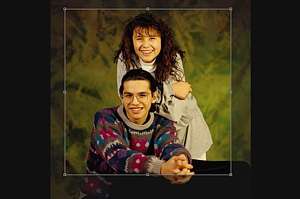
CROP TOOL HINTS:
When you are satisfied, double-click inside the crop marquee to crop the photo.
3. Object from Background and Create Background.
We need to convert the image into an object.
Use Object > Create > From Background.
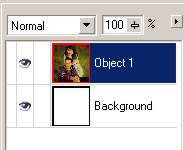 If you look at your Object Docker before and after you do this you will notice
that the name of the object changes from 'Background' to 'Object
1'.
However we still need to have a background for our photo's border. When we create a new background, Photo-Paint always uses the current PAPER colour as the new background colour. In Photo-Paint 11, the PAPER colour attribute has been renamed BACKGROUND. Ensure the paper colour is white using a CTRL+ left click on the white colour palette swatch. To create a new background use . If you inspect your Object Docker you will now see a background object below Object 1.
4. Increase the Paper size.
A Polaroid photo has a border of approximately 5% of its size on the left, top and right edges and about 20% of its height as its bottom border.
Select to
display the Paper Size dialogue.
This feature of Photo-Paint is similar to 'Canvas Size' in other
programs.
You may wish to change the units of measurement by selecting Pixels from the drop down list. I seem to work more accurately when using pixel units.
Note the Current Width value and calculate approximately 10% of this (5% for each side) then add the amount to the value of the New Width parameter. Here I have changed the New Width value to 610 pixels.
Calculate the value for approximately 25% of the Current Height (5% for the top and 20% for the bottom), and add this amount to the value in the New Height parameter. Here I have changed the New Height value to 720.
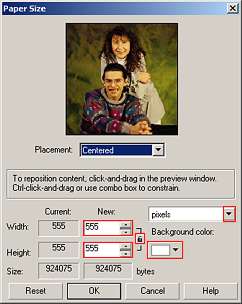 |
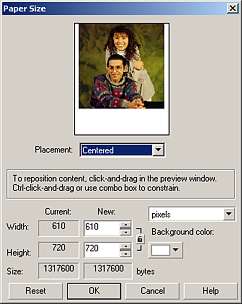 |
|
| Before | After |
The existing image can also be constrained to various positions within the new Paper Size.
Hold down the CTRL key while dragging the preview image straight upwards so that it snaps to the middle of the top edge of the paper.
Holding down the CTRL key while dragging in the Preview pane constrains the positioning of the image within the new paper size. It will snap to each of the corners, to the centre of each edge and to the centre of the paper. Dragging the preview without constraining with the CTRL key allows you to place the existing image anywhere - even partially or completely outside the paper - causing the image to be cropped at the paper boundary.
Position the current image so that it sits at the top centre of the new paper size pane then press OK.
5. 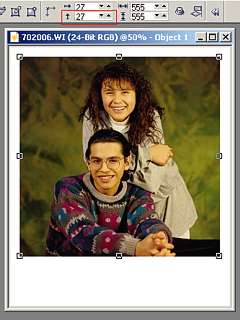 Reposition
the image object.
We need to accurately move the image downward so that the top and side borders are the same width.
Select the Object Picker Tool then click on the image object (Object 1).
The Property bar changes to reflect your choice of tool and selected object.
Make sure you are in Position and Size Mode for this tool (Choose the 4-way arrow from the drop down list on the Property Bar in Photo-Paint 8, 9 or 10, or the icon in version 11). If you rest your cursor on a mode selector for a second or two, the pop-up Help bubble will help you determine the correct mode.
The value in the vertical position readout on the Property bar should read '0' as the object lies flush with the top of our new background. Calculate 5% of the original image size. Put simply, this is half of the value we increased the Paper Size width by when we adjusted the Paper Size in th previous step. In my example this is half of 55 = 27 (approximately). Type this value into the vertical position spinner box on the Property Bar then press ENTER. Now both horizontal and vertical position readouts should be either the same or very close. and your image looking more like a real Polaroid.
6. Final Touches - Adding a slightly raised edge to the border.
A Polaroid photograph always has a thick paper border protecting the picture, giving it a 3D appearance. We can emulate this in Photo-Paint.
To do this we need to create a mask of the white background portion around the image. The easiest way to do this is to use the Magic Wand Tool from the Mask Tool Flyout, but let's do it another way this time, using our Mask Modes.
First, select the photo portion of the image with the Object Picker Tool (click on the photo so the transform handles appear).
Now make sure that the Mask Mode is set to Normal by choosing
any Mask Tool and selecting the Normal Mode (Arrow icon, ![]() )
from the Property Bar.
)
from the Property Bar.
Create a mask of the entire image including the background ( or CTRL+A).
Change the Mask Mode to Subtractive by choosing the Subtractive
Mode (minus icon, ![]() ).
).
Now create a mask from the photo area using (CTRL+M).
 If
either the Mask Marquee or the Mask Overlay are visible you will now see a mask
only around the border area.
Now select the background: choose the Object Picker Tool then select the background either in the workspace or via the Object Docker.
Create a slight bevel on the background using The Boss Effect
(). Use these
settings:
(Edge Tab)
Width = 4
Height = 7
Smoothness = 0
Drop Off = Flat
Invert = checked(Lighting Tab)
Brightness = 0
Sharpness = 30
Direction = 315
Angle = 45
Then Press OK.
Remove the mask ( or CTRL+R)
Your completed image should now look like a Polaroid photo.

Three Polaroids with drop shadows in a single construct.
================================================
| Fun With Photos #2 | |||||||||
| Intro | Simple Borders | Frame Effects | Multi Photo | Picture Frames | |||||
| Series Intro | Polaroids | Intro, Single Frame, background object | Multi frame, background object | Frames with floating objects | Create your own Frame | Photo Displays | Basic Picture Frame | Enhanced Picture Frame | |
| « Prev | || | || | Next » |
| - More Tutorials - | - Contact Me - | |
| - Copyright © 2003 David Mutch & Visionary Voyager Corporation P/L - |