|
Part 4: |
|
The Wooden Text. |
We will use the same wood fill for the text fill.
COREL text.
For this text we need a heavy, wide font. I have chosen Futura XBlk BT.
- Select the Text Tool and then the Centre alignment from the Text Property Bar. In the Tools Settings Rollup, choose Futura XBlk BT as the font and set the Font Size to 150. Leave the Character Spacing at 0% but ensure that Anti-Aliasing AND Render To Mask are both checked.
We need to create a mask only, so that it can be filled later.
- Click near the centre of the image, underneath the boomerang and type COREL'. Adjust the position of the text if necessary, then click the Object Picker Tool to create the text mask. Check the Show Mask Marquee icon on the Toolbar if necessary to see the mask. Save the mask as a channel (Mask./Save/Save As Channel). I called mine `COREL text´. Click on the ToolBar to save the entire image and the mask channels.
Give the text a wooden fill.
- Click the Wood Fill object on the Objects Docker then click Copy and then Paste As Object (on the ToolBar) to create a new object with the wood fill.
- Rename the object `COREL text´.
Change the characteristics of the wood-filled text.
- With the text mask still showing and the new object selected, (my Lock Transparency is still checked but it probably doesn't matter here), click Image/Adjust/ Brightness-Contrast-Intensity from Image menu. Adjust the settings in the Tool Settings Rollup to: B -6, C 29, L 0, then click OK.
Make it like 3D - Boss it!
- Click 3D Effects/The Boss from the Effects menu. Adjust the settings to: width 8, smoothness 100, height 50, brightness 100, sharpness 10, direction 45, angle 45, drop-off mesa, then click OK.
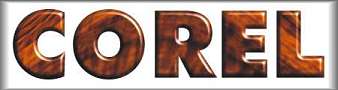
- Your text should look like that shown in Figure 10.
- Save the image at this point.
|
Figure 10. The wood-filled `COREL´ text. |
Backup the boomerang object (just in case).
- Select the boomerang in the Objects Docker, then click Copy, then Paste As Object. Move (drag) the new object down below the wood fill object, then make it invisible (click the eye icon).
Create the DOWN text.
The Down Under' text is engraved into the boomerang.
Each word is located on a separate arm of the boomerang and thus we need to create each word separately. At this stage it may be a good idea to make a backup copy of our boomerang in case things go wrong.
- Click the Text Tool. Leave the font as but change the Font Size to 72. Ensure the Render to Mask option is checked. Click on a blank white space in the image and type "DOWN". Click the Objects Picker Tool to render the mask. (Turn the Show Mask Marquee feature on if you don't see the text mask immediately).
- Click the small triangle beside the Object Picker Tool to open the Object Picker Tool flyout and select the Mask Transform Tool.
- Move the mask down so that the leading edge of the W' is central to the left arm of the boomerang.
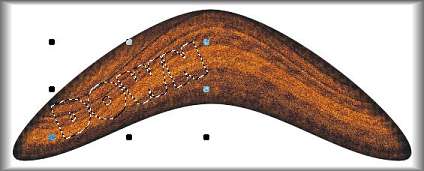
- Click once on the mask to display the rotation handles. Rotate the mask so that is lines up with the left arm of the boomerang. (Figure 11). Click Apply on the Property Bar when you are satisfied with the position of the mask.
- Save the mask as a channel with a name such as DOWN text'.
|
Figure 11. The `DOWN´ text mask on the boomerang. |
Engrave the DOWN text.
Now to give the mask some body. Make sure the boomerang object is selected (not the backup copy we made earlier).
- Select 3D Effects/The Boss from the Effects Menu then change the settings to the following (I assume that the previous settings have been retained!): smoothness 25, height 100, sharpness 5, angle 75 and then click OK.
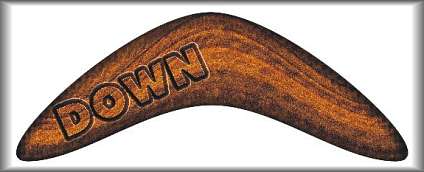
- This should give the boomerang the appearance of carved or etched text as in Figure 12.
|
Figure 12. The `DOWN´ text after `bossing´ to make it appear engraved into the boomerang. |
The UNDER text.
- Using steps A-C above for the DOWN text, create some UNDER text. This time however, align the mask along the right hand arm of the boomerang.
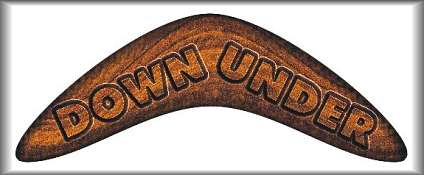
- Save the mask as UNDER text' then Boss it as before. Refer to Figure 13 for the result.
|
Figure 13. The `DOWN´ and the `UNDER´ text after `bossing´ to make them appear engraved into the boomerang. |
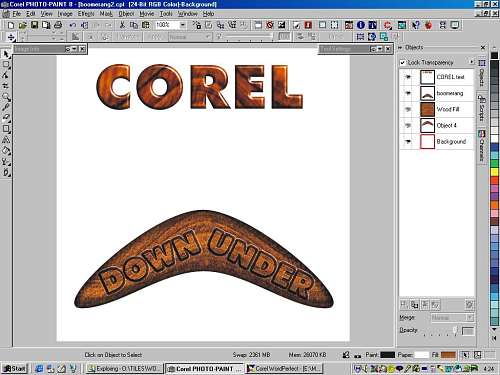
Now we have an engraved boomerang and some wooden COREL text.
- Move the two objects around so that the COREL text is above the boomerang as in Figure 14 which also shows the current visible and invisible objects in the Objects Docker.
|
Figure 14. My current screen showing the changed position of the two objects and the contents of the Objects Docker. |