|
Part 6: |
|
The Final Touches. |
To complete our image we need to add some light drop shadows and a background, and convert the background attributes.
Drop shadows.
Ensure that no masks are active by turning on the Show Mask Marquee icon.
- Select the boomerang object. Click Object/Drop Shadow from the menu and change the settings to: Flat, direction 270 degrees, offset 7 pixels, opacity 60%, colour white, feather width 10, feather direction average, then click OK.
- Select the COREL text object and repeat the drop shadow effect using the same parameters.
The backdrop.
- Create a new object ( New Object from the Objects Docker ) and position it just above the background.
- Click Edit/Fill from the Menu and add the same fountain fill used before to this entire object.
- Select Image/Adjust/Brightness, Contrast, Intensity from the Menu and change the settings in the dialogue to: B-34, C52, I-10, then click OK.
- Select the circle object and change it's Merge Mode to Hard light. Keep the Transparency to 100%.
- Change the objects name to "backdrop".
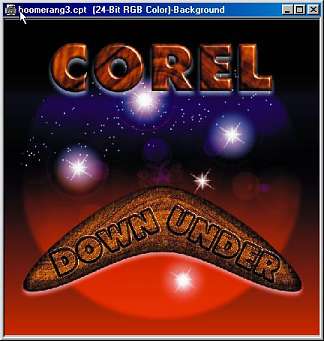
- Adjust the position of the COREL text and the boomerang so that they appear like Figure 22. Ensure they are both centred vertically to the document ( Object/Arrange/Align and Distribute ).
|
Figure 22. |
The Vignette.
- Fill ( Edit/Fill )the background layer with 100% black.
- With the backdrop object selected, choose the Vignette effect from the Effects/Artistic menu. Change the settings to: offset 102, fade 8, then click OK.
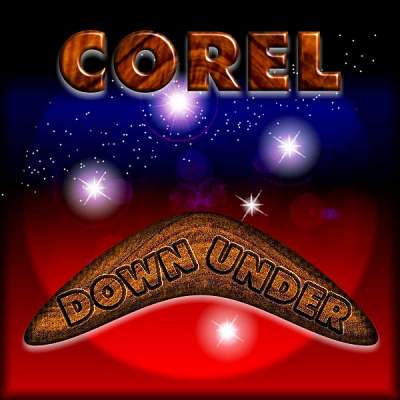
- Save the image in .cpt format. If you like you can now delete the wood fill and spare boomerang objects to conserve space before you save.
|
Figure 23. The completed logo image. |
Conclusion.
Well Corel PHOTO-PAINT fans, that's it for another session. I did say it was quite long didn´t I !. Still I hope you enjoyed it and that you have gained something useful from the tutorial.
Some of the ideas I have for future tutorials include the clip mask feature, more on brushes and brush shapes including the marvellous Image Sprayer Tool, more on stroking masks and paths, and more on merge modes. I have also had a request for a tutorial on creating animations which should include both the good and the bad of using PHOTO-PAINT to do this.
Again, please contact me if you have any questions, suggestions, requests or comments regarding these tutorials. I for one always learn something when I interact with other users of this application - there is always something new, something undiscovered, or other ways to achieve exciting and spectacular graphic creations with Corel PHOTO-PAINT.
See you next time.