Part 1: On Screen Look and Feel

1. Customization.
All of the commands available in the application can be displayed in a single list in the Options > Customization dialogue box, allowing you to customize the menus, toolbox, toolbars, and status bar all at once.

The Options > Customization dialogue box allows you to customize Command (Menu) bars, individual Commands, Shortcut Keys, the appearance of command icons (has an in-built icon editor) and your colour palettes. Commands can be located from within each Menu bar, or from a global list.


Unfortunately, as in previous versions, you cannot yet customize any scripts, probably because the new VBA script engine for Photo-paint is still incomplete. Hopefully this will be fixed in subsequent Service Packs. (See Part 7)


Lots of Customization Options.
Each of the tabs in the Customization dialogue box leads to different groups of options such as where the command exists throughout your workspace, the shortcut keys assigned to each command, and the actual editable icon associated with each command


To add or move a Command or menu using the Options > Cuistomize dialogue box, you simply drag it to a new location on any Menu, Toolbar, Property bar or the Toolbox!


You can also drag-and-drop menu items from the menu to a property bar or to another menu by holding down the ALT key. This new feature is identical to that in Draw 10.


HINTS and TIPS on Customization:

Copy, not move. In many cases you would prefer to COPY a tool icon or menubar icon to another position rather than MOVE it.
To COPY any item, just use CTRL+ ALT instead of just ALT.

Menu Items. Moving and copying MENU items are a little tricky If you press ALT after the menu has opened the menu will just close again. Here's what to do:

  • To COPY a menu item either -
    (a) press and hold CTRL-ALT first, then click on a menu and then a submenu item, then click and drag to a new position. OR, (b) progress through the menus as you normally would until the item you would like to copy is highlighted then hold down CTRL first, then ALT (together), then Click and drag the item to a new position.

  • To Move a menu item -
    you need to press the ALT key first, then CLICK on the the menu structure items until you reach the one you want (keep ALT pressed continuously). Then drag to your new location

  • Look out for the grey box surrounding an item as you prepare to move it - this lets you know that you are about to customize this item. If you have successfully 'hooked' an icon for customization, the grey box will appear. Initially you will also see a 'No' symbol.

  • Look out for the grey I-bar which will appear when you are in a position to drop the icon into a customized location. If the I-bar doesn't appear (just the 'No' symbol or an X symbol) then PP will jump out of the customization process without moving the item.

Restoring Defaults:

  • IMHO, it is always better to leave the default settings as they are. Create a new, separate workspace first and then customize this. If you ever need to press F8 during start-up of the application (to reset it to default settings), it will return the CURRENT workspace to defaults, and therefore you will lose your customizations. If you DO need to reset (F8) then I advise you to rest the current workspace back to the _default first, close Photo-Paint and then press F8 while restarting it.


2. Export/Import Workspace.
You can export your customized workspace, or portions of it, and share it with others. Also included is a built-in option to export your customized workspace to email.


I really like the new customization controls. One of the first things I do after installing a new version of Photo-Paint is to create a new workspace for myself and then customize it. Below is an example of my customized workspace:

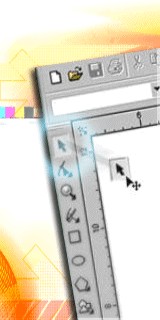
My own customized Workspace.

If you would like to try the Import/Export features of PP10,
you can download as ZIP file of this workspace here (dam_workspace1.zip = 6 KB, unzipped = 26 KB)


3. Common Workspace.
The toolbox and all of the menus and property bars have been revisited so that icons and tool placement match throughout the application.

Some of the changes from previous versions of Photo-Paint include:

New status bar icons (rather than text):
:New Menu item icons (all menu items now have icons)
New look for context-sensitive right-click on Toolbar areas. New Workspace options here also:


What's New in Photo-Paint 10 - PART 1

Copyright © 2001, Visionary Voyager Corporation Pty Ltd. All rights reserved.