Part 2. Productivity and Performance
|
1. Smoother and Faster Display.
Display caching lets you pan and zoom in real time, even on large images. You can set the number of Cache levels you wish to use in the Memory section of the Options dialogue. The more memory you have, the better to set this level to the highest (4) for best performance.
Generally I find Photo-Paint far superior than PhotoShop for navigating medium to large sized images. PhotoShop always redraws its screens in a very chunky manner while Photo-Paint is as smooth as silk.
On computers with less memory, or when using extremely large images, some people on various newsgroups have recommended to reduce the display caching setting to 1 or 2. To adjust it, use Tools > Options > Workspace > Memory. Changes will not be reflected until you close then restart Photo-Paint.
However, I have not yet seen that changing the cache settings affects my work one way or another - I don't usually work with extremely large files.
|
 |
|
2. Real Time Preview.
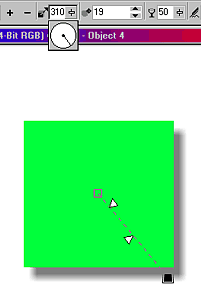
You can now preview formatting options and effects before applying them to your image using RealTime Preview. You can scroll through and preview formatting options and effects, such as the Interactive Drop Shadow, and see how they affect the active object or image.
This feature also works well with the Transparency Tool, Merge modes and many other tools.
The Real Time Preview works both with formatting options on the various Property Bars as well as with the interactive tools such as those on the Drop Shadow tool.
The preview is fast, even on relatively slow machines. One distracting aspect of this feature though is that often, slight video corruption appears during object manipulations. This sometimes appears as onion-skinned rectangles surrounding the object or, in the case of masks, multiple blue boxes. The video corruption disappears the instant the manipulation is complete (when the mouse button is released, but appears unsightly and a bit worrying when you first see it. So far I haven't noticed any lasting detrimental effects form this though.
|
 |
3. New Import/Export Types.
Extensive support for popular file formats have been added, including XPixMap (.xpm) and The GIMP (.xcf).
4. Presets and Preset Previews.
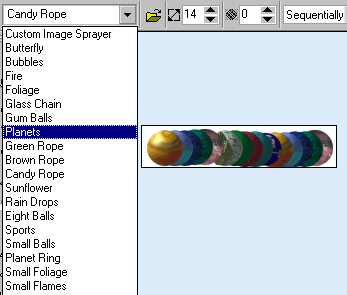
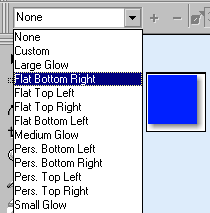
Many of the interactive tools now come with presets that let you view and apply predefined settings for those tools quickly and easily. Just like Draw 10, Photo-Paint 10 now shows thumbnails of many of its presets (even the one's you've saved yourself!) including those for drop shadows, brushes, image sprays, and lots more.
 |
 |
| Image Sprayer Preset Previews |
Drop Shadow Preset Previews |
5. Hide Active Object.
This new feature lets you hide objects and changes on different layers using the list in the Object Docker window. You can edit objects within an image, trace the history of their changes, and create what-if scenarios using this feature. When you press the ‘eye' icon of the active object in Photo-Paint 10, only the active object becomes invisible. In previous versions, everything else BUT the active object turned invisible.
One note about this new feature though - Once you hide the active object the cursor is replaced with a 'NO' symbol when over the image. No changes to the image can be made. You must select another (visible) object before (using the Object Docker) be you can continue working on your image. I am not sure whether this is a bug or not.
6. Instant Apply and New Apply Reset Buttons.
 Previously, all changes made to objects in Photo-Paint needed to be 'Applied'. Now, simply selecting another object or (in most cases) another tool will automatically apply the transformation. New Apply and Reset icons appear on some of the Property bars and also if you right-click on an object during any transformation.
 |
 |
 |
 |
 |
| What's New in Photo-Paint 10 - PART 2 |
Copyright
© 2001, Visionary Voyager
Corporation Pty Ltd. All rights reserved.



 Previously, all changes made to objects in Photo-Paint needed to be 'Applied'. Now, simply selecting another object or (in most cases) another tool will automatically apply the transformation. New Apply and Reset icons appear on some of the Property bars and also if you right-click on an object during any transformation.