Part 4. Text Handling

1. Small Text Improvements.
The Anti-Aliasing tools have been expanded to give you better quality text, especially at small point sizes.

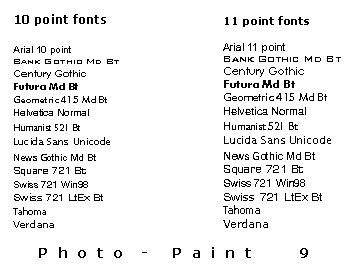
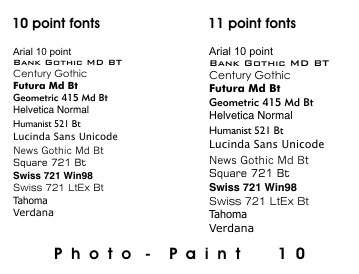
The example to the right shows small text created in PP9 (left) compared to the same text created in PP10 (right).

The example below shows the difference between PP9 and PP10 when rendering small text using a variety of different fonts. As you can see, version 10 is far superior to version 9 in this feature.

Small Text Rendering using different fonts in PP9 Small Text Rendering using different fonts in PP10


2. Top Hinted Text.
Top Hinted text is a new option that aid the clarity of text at small point sizes. It applies differential anti-aliasing to small fonts to make text easier to read. The example shown below, right is 19 point Arial text, magnified 5 fold. The text in the first line is not top hinted, while the text below that is. The effect is only slight but certainly does improve the appearance of small text.
The Top Hint toggle icon on the
Text Property Bar
Ten point Arial text magnified 5 fold.
The text at the top is not top hinted while that below is.


3. Text on a Path.
The Text-On-A-Path tool lets you bind text to a path, leaving both the path and the original text editable. This is a real KILLER feature and the settings on the Property bar after text is applied to a path are almost identical to those in Draw, making it easy and familiar to use.

To place your text on a path, well, you need some text, and a path. The path can be created in any manner, either freehand, by tracing around an existing object, from a mask.

Use the path tools to create your path.

If the path contains too many nodes to your liking then click the Shape Tool (the large arrowhead on the far left of the Path property bar), marquee select the entire path, and then adjust the 'Smoothens the Curve' spinner value upwards to reduce the number of nodes on your path. The higher the value, the fewer the nodes.


The 'Fit Text to Path' command is in the Object menu: Object > Text > Fit Text to Path. Choosing this changes the cursor to a large black arrowhead with a 'path' symbol below it. As you get close to any path, an 'A' appears on the cursor to let you know you can now drop your text onto the path. The text will be placed so that the first letter is dropped at the point where you click on the path.

To alter the text on the path, click on the text (on the path) with the Text Tool. The Text Property bar now displays advanced options for controlling and positioning the text on the path. The options are almost the same as text-on-path options in Corel Draw - Wonderful.

The text on the path can be edited just the same as regular text and each text object can contain any combination of fonts, font sizes, text colours, and advanced text features.

TIP!

Here's a great tip for an easy way to place text on a path, thanks to Luther Walke of Where2Learn in Huntsville, AL, USA (thanks Luther):

You don't need to create your 'straight' text first and then use the menus to place it on a path - you can create text directly onto any path!

Try this:
 

  1. Create your path (either using the Path tools or from a mask)
  2. Click on the Text Tool in the Toolbox
  3. Move your cursor close to any point on the path until it changes to an I-beam with a small A and a squiggle
  4. Click once, and then start typing - the text will start at the point where you clicked and will initially be in the last-used font, size and current paint colour.


4. Text Transformations.
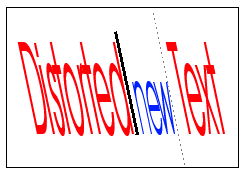
You can now maintain the editability of text even after it has been transformed in some way. Not all object transformations will be maintained after editing text however- only size, scale, rotate and skew will be maintained. Distort and Perspective transform mode changes will not be maintained and the text object will revert to its original shape.

This is definitely a step forward but I think it still has some way to go.

For instance, text in Corel Draw 10 can be transformed in almost all possible ways including extreme distortions with the distortion tool and still maintain editablity.


What's New in Photo-Paint 10 - PART 4

Copyright © 2001, Visionary Voyager Corporation Pty Ltd. All rights reserved.