 |
|
|
|
|
PART 6. Colour and Printing
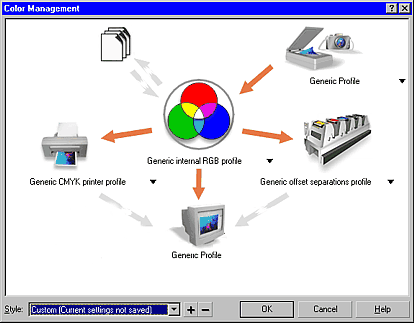
Click on any of the device icons themselves opens up Advanced Colour management features dialogue boxes for that device. For instance, clicking on the Import/Export device (the set of 3 pages on the upper left), allows you to set whether to use embedded ICC document profiles when importing, if no ICC profile then which other, whether to embed internal RGB or ICC profiles while exporting etc. Whether to embed an internal RGB profile in your images is important, especially for JPEGs used on the web, which do not normally contain embedded profiles. If you find that the JPEGs you create in PP10 seem unreasonably large, then look here and turn off embedding during export (or click the outward bound orange arrow to the import/export manager) to reduce their files sizes back to normal. An embedded internal RGB profile can add about 170KB to a JPEG file!
Colour Management really is an art and a full explanation is far beyond the scope of this simple review. There are many great web sites and books where you can learn more about it. A graphics system that has been colour tuned with your own specific device profiles will ensure that WYSIWYG lives up to its name both on screen and on paper.
2. Publish to PDF Enhancements.
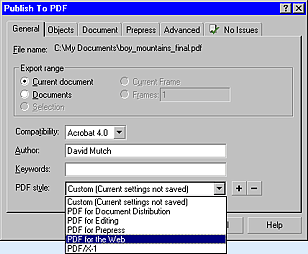
You can now embed an ICC colour profile, author and keyword information, and any type of file into a PDF file. You can also publish several open documents to one multi-page PDF file.
The dialogue boxes shown below appear when you press the 'Settings' button on the 'Save as PDF' dialogue box (where you choose a file name and folder to save in) after choosing File > Publish to PDF.
 |
 |
| The General Tab on the Publish to PDF dialogue box. Here you can set the output PDF version, select single or multiple open documents, choose a preset PDF style or create your own. |
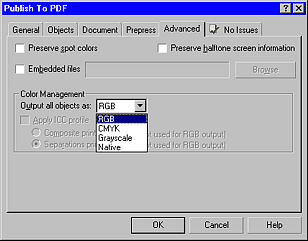
The Advanced Tab on the Publish To PDF dialogue box. |
 |
|
| The Preflight Tab and preflight Settings in the Publish To PDF Export dialogue. The Preflight Settings dialogue also lets to set options for printed output, SVG Export and SWF (Flash) output. You can create your own personal preflight checking options presets and save them for later use and for specific tasks. |
|
|
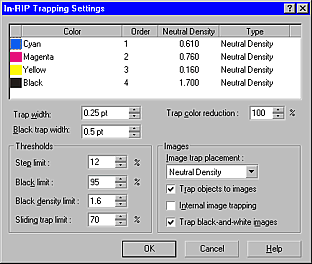
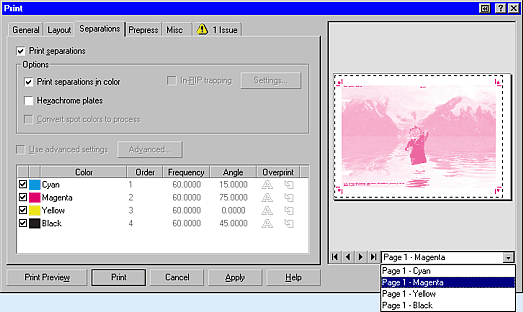
4. Print Separations.
|
 |
| What's New in Photo-Paint 10 - PART 6 | ||||
Copyright
© 2001, Visionary Voyager
Corporation Pty Ltd. All rights reserved.
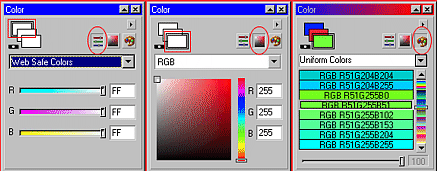
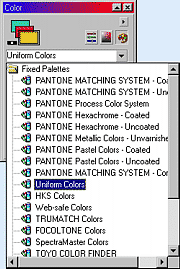 When using Colour Palettes, any palette can be chosen from the full list available in the drop down list just above the named colours list.