| |
|
| |
|
|
Patina is an ornamental coating to bronze or copper, usually green in colour, and usually added to the metallic surface using chemicals. Also, it can be a glossy green coating produced by age on woodwork. We look at the glossy metal type here.
This tutorial can be used in Corel Photo-Paint from version 8 upwards.
Main Method | Variations
|
|
|
| |
|
|

 Create a new image. Create a new image.
From the menu choose
File > New.
Use the following settings in the Create New Image dialogue box, then click OK.
- Colour Mode: 24-Bit RGB
- Background colour = white
- Units = pixels
- Size = 500 W x 200 H
- Resolution 72 dpi.
|
|
|
| |
|
|
 Create the text then centre it. Create the text then centre it.
Select the Text tool  from the Toolbox. from the Toolbox.
Choose a medium width font. I have used Bauhaus, but could have also used Bookman Old Style Bold, Brassfield, Charter Bd BT, Copperplate Gothic Bold, etc. but this effects will work many others fonts, including script and fancy fonts. Set the size to 72 or 96 depending on the font chosen. The colour of the text is not important in this example.
Click inside your image and type the words " Metal Patina'.
Click on the Object Picker Tool  to apply the text. A new text object called 'Metal Patina' appears just above the background object in the Objects Docker. to apply the text. A new text object called 'Metal Patina' appears just above the background object in the Objects Docker.

|
|
|
| |
|
|
 Turn on Lock Transparency. Turn on Lock Transparency.
Click the  icon on the bottom of the Objects Docker or on the Mask/Objects Toolbar. icon on the bottom of the Objects Docker or on the Mask/Objects Toolbar.
We will use Lock Transparency rather than a mask to constrain the fill to the object boundary.
To read more on Lock Transparency see the Lock Transparency TIP.
top
|
|
|
| |
|
|
 Fill the text object with a Metal Patina Fill. Fill the text object with a Metal Patina Fill.
From the menu select Edit > Fill.
Select the Texture Fill icon
 then click the Edit button. then click the Edit button.
Follow the instructions in the TIP: Creating and Storing Texture Fills (Part B). then return here.
You text should now look like this:

|
|
|
| |
|
|
 Duplicate the filled text object. Duplicate the filled text object.
Use CTRL+D
to duplicate the text object.
A new object called Object 2 should appear above the original in your Object Docker.
The new object will automatically be selected.
|
|
|
| |
|
|
 'Streak' the surface. 'Streak' the surface.
The Lock Transparency should still be ON.
Open the Motion Blur dialogue: (Effects > Blur > Motion Blur).
Change the settings to: Distance: 15, Direction: 135, Ignore pixels outside image, then press OK.

|
|
|
| |
|
|
 Adjust
the HSL (Hue/Saturation/Lightness) of the object. Adjust
the HSL (Hue/Saturation/Lightness) of the object.
Open the HSL dialogue: Image > Adjust > Hue/Saturation/Lightness.
Change the settings to: Hue: -10, Saturation: -25, Lightness: 0, then press OK.

|
|
|
| |
|
|
 Select the lower text object and reposition it. Select the lower text object and reposition it.
Click the lower text object in the Objects Docker (should be called ' Metal Patina').
Reposition the object 3 pixels down and 2 pixels left using the keyboard arrow keys (each press moves the object 1 pixel).
top
|
|
|
| |
|
|
 Adjust the Intensity of the lower text object. Adjust the Intensity of the lower text object.
With the lower text object still selected, open the BCL dialogue : Image > Adjust > Brightness-Contrast-Intensity
Press the Reset button and then change the Intensity slider to -50 (check that B=0 and C=0), then press OK.

|
|
|
| |
|
|
 Combine the two text objects together. Combine the two text objects together.
Select both text objects in the Objects Docker using SHIFT+click or CTRL+click.
Combine the objects together using either Object > Combine > Combine Objects Together, CTRL+ALT+DownArrow, or right-click the selected objects in the Objects Docker and choose Combine > Combine Objects Together from the popup menu.
|
|
|
| |
|
|
 Add a drop shadow. Add a drop shadow.
 Click the Drop Shadow tool , then select 'Flat Bottom Right' from the presets drop down on the far LHS of the Property bar. Click the Drop Shadow tool , then select 'Flat Bottom Right' from the presets drop down on the far LHS of the Property bar.
Click the Object Picker tool to apply the shadow.

|
|
|
| |
|
| |
|
|
|
| |
|
|

Crinkled Edges:
- After you have typed your text in Step 2, create a mask from it (CTRL+M), or select the Render to Mask  option on the Text Property bar before creating your text. option on the Text Property bar before creating your text.
- Switch to Paint on Mask (POM) Mode (CTRL+K) and apply a Scatter Effect (Effects > Creative > Scatter) at 3 pixels for both horizontal and vertical axes.
- Switch back to non POM mode (CTRL+K), create a new object (Object > Create > New Object or  ) and fill the object with the Metal Patina Fill as in Step 4. Remove or save the mask and continue the tutorial from Step 5. ) and fill the object with the Metal Patina Fill as in Step 4. Remove or save the mask and continue the tutorial from Step 5.
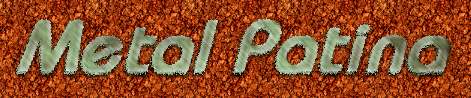
In this example the background was filled with a cork-like Bitmap Fill.
Top
|
|
|
| |
|
|
3D Sculptured Look:
- Create your Metal Patina text as described in steps 1 - 11 above. Make sure the finished text object is selected then apply a Bump Map at the default settings ( Effects > Custom > Bump Map, choose default from the Style drop down list).

If you like you can repeat the effect (Effects > Repeat > Last Effect, or CTRL+F) to give a stronger texture.

Top
|
|
|
| |
|