Creating
an Iced Cookie Text Effect in Corel Photo-Paint
-by David Mutch, August 2002.
|
Creating
an Iced Cookie Text Effect in Corel Photo-Paint |
Feeling hungry? This text effect should make your images and documents look scrumptiously delicious - good enough to eat. The effect can be applied to text using Corel Photo-Paint from version 8 and up.
STEPS:
 |
Create
a new image: |
|||
 |
Prepare
the cookie batter (Paint Colour): Double-click the Paint Swatch on the Status bar and change the colour to R196, G149, B90. |
|||
 |
Create
some thick cookie-coloured text: Centre the text to
the image using Object > Arrange > Align
and Distribute. (Fig 1). |
 Fig 1. |
||
 |
Add a biscuit
texture to the text: For PP8, use Effects
> Artistic > Canvas Save these settings as a preset in this dialogue box: Click the “+” button beside the Styles drop down list, type ‘Cookie’ then press OK. Press OK again to
set the texture to the text object (Fig 2). |
 Fig 2. |
||
 |
Cook the mix
and make it rise:
Save the setting as
a‘Cookie’ preset in the Glass dialogue by pressing the ‘+’
button beside the Style box as you did above. Press Ok to apply the Effect
(Figs 3a and 3b). |
|
||
 |
Prepare
for the icing: Create a new object: The new object will be placed above the existing text object. Set the Paint colour
to White |
|||
 |
Ice the Cookies: Select the Paint
Tool Paint white strokes
on the top surface of the cookie text, leaving some of the cookie surface
visible around the ‘icing’. Don’t worry about being
too careful here - make it a bit messy - just like icing really is!. (Fig
4). You may have to adjust the Nib Size for the thinner sections. TIP: Using a pressure sensitive pen in a situation like this can be most helpful. (Fig 5) Tip:
Another way to 'ice the cookie' is to create a mask from the Cookie text,
reduce the mask by several pixels and then Fill it with white ;-) |
|
||
 |
Gloss
up the icing: Reapply the Glass
Effect using the saved Cookie preset. If you like, you can reduce the
Opacity to around 30 and increase the brightness to 90 to give the icing
a brighter look but the preset cookie values work just fine. (Fig 6) |
 Fig 6. |
||
 |
Add some ‘sprinkles’: (PP8 users select Color Noise here) (Fig 7) |
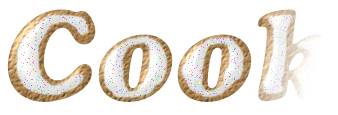 Fig 7. |
||
 |
Add a drop
shadow to the cookie: That’s it!. |
|||
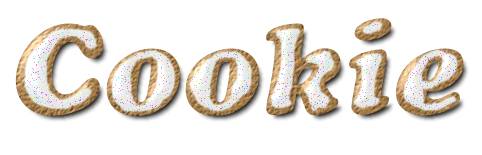 Fig 8. |
||||
| T e
x t E f f e c t s # 3 M
e n u : <- PREVIOUS || NEXT ->
|
||||||||||||
|
||||||||||||