| |
|
SERIES
MENU: <-PREV | NEXT->
Intro | Easy
Fire | Complex Fire # 1 | Complex
Fire # 2 -|||||- Easy
Ice | Complex Ice # 1 | Complex
Ice # 2 | End

Fig 1
|
1.
Create
a new image: 
RGB, 100% White background, 300 pixels, 300 dpi
2.
Change the Paint colour to 100% Black.
Create a new text object “ICE” using Arial Black at
36 points.
Centre the Text object to the document.
Object
> Arrange > Align and Distribute, or  ,
then Center to Document ,
then Center to Document
(Fig
1)
|

Fig 2
|
3.
Apply
a sand displacement effect
With the ICE text object still selected, from the menu choose Effects
> Distort > Displace, or 
Choose sand.pcx
from the displacement map
drop down list and change:
Scale Mode = Tile
Scale Horizontal = 4
Scale Vertical = 4
Press OK
(Fig
2)
|

Fig 3
|
4.
Add
Noise to the text object
Effects
> Noise > Add Noise, or 
with the following parameters:
Noise Type = Uniform
Level = 70
Density = 50
Color Mode = Single
Color = white (0% black)
(Fig 3)
|

Fig 4 |
5.
With
the ICE text object selected,
toggle Lock Transparency ON
(click the Lock Transparency icon  on either the
Mask/Objects Toolbar or on the Objects Docker).
on either the
Mask/Objects Toolbar or on the Objects Docker).
6.
Apply
a Gaussian Blur
Effects
> Blur > Gaussian Blur, or 
Radius = 8
(Fig 4)
|
Fig 5a

Fig
5b
|
7.
Toggle
the object’s
Lock Transparency OFF
8.
Apply
a Tone Curve to the ICE text object
Image
> Adjust > Tone Curve,
or 
Use
the image here to set up your tone curve
or you can download and load the tone curve
I used - click HERE (zipped
file).
Figs
5a and 5b |
| 
Fig 6
|
9.
Apply
a Wind Effect
Effects
> Distort > Wind , or 
Strength = 50
Opacity = 100
Angle = 270
(Fig 6)
|

Fig 7 |
10.
Combine
the ICE text object
with the background
CTRL+SHIFT+Down
and then invert the image
Image
> Transform >
Invert,
CTRL+SHIFT+I
or 
(Fig 7)
|
Fig 8
|
11.
Reapply
the wind effect
to the combined background object
using the same parameters as for step 9
(Fig 8)
|

Fig 9 |
12.
Select
the Mask Wand tool, (
W or  ) )
change the Color Similarity level
on the Property Bar to 2,
then click on the black background
of the image to select the black background.
13.
Force
the mask to surround
all black areas using the Similar command
Mask
> Mask Outline> Similar (Vers.
11+)
Mask
> Shape > Similar (Vers. 8-10), or 
then Invert the mask
Mask
> Invert, CtrL+SHIFT+I
or
Fig 9.
|
| 14.
Copy
the selection
Edit
> Copy, CTRL+C,
or 
then Paste it
Edit
> Paste > Paste As New Object, CTRL+V,
or 
to create a new object.
Select the new object in the Object Docker.
15.
Remove
the Mask
Mask
> Remove, CTRL+SHIFT+R,
or 
|
Fig 10 |
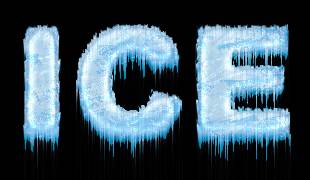
16.
Apply
an ICE Bump Map
Effects
> Custom > Bump Map or 
Select Ice from the Style drop down list.
Press the Reset button
to reset any previous changes,
then click on the Lighting Tab
and change the Declination to 60,
deselect the Auto Compute Brightness checkbox
and change the Ambient Light Brightness to 75
Press OK
(Fig
10) |

Fig 11
|
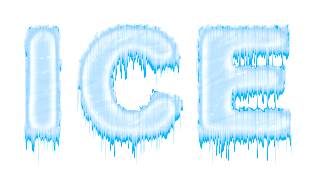
17.
With
the ICE object still selected, adjust the Colour Balance
Image
> Adjust > Color Balance, or 
Deselect Highlights in the Range section
(so Shadows, Midtones and Preserve luninance are selected),
In the Color Channels section set:
Cyan-Red = -46
Magenta - Green = 0
Yellow - Blue = 53
(Fig 11)
|
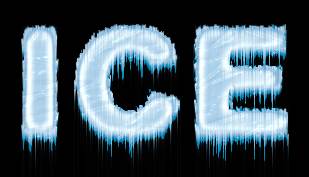
Fig 12
|
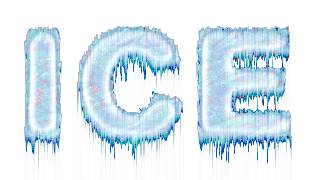
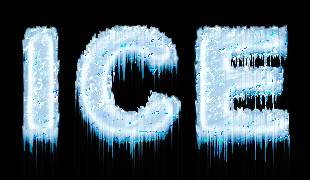
18.
Adjust
the Gamma of the ICE object
Image > Adjust >
Gamma, or 
Gamma Value = 3.02
(Fig 12)
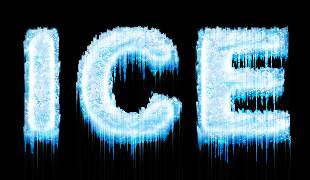
Now
you could actually stop at this point
but here are some more steps to make
the effect even more interesting.
|
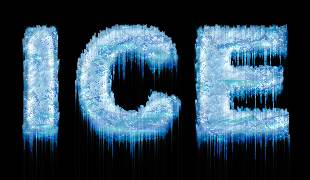
Fig 13a
Fig
13b
Fig
13c
Fig
13d
|
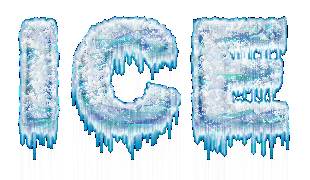
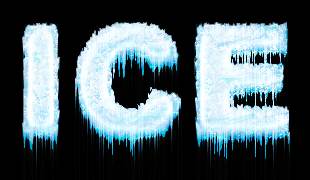
19.
With
the ICE object selected,
duplicate it (CTRL+D)
and select the duplicate (topmost) object.
20.
Apply
a Palette Knife Art Stroke
Effects > Art Strokes
> Palette Knife, or 
Click the Reset button on this dialogue box
then change the angle to 245.
21.
Change
the Merge Mode and Opacity of the top ICE object:
Fig
13 a: Mode = Subtract, Opacity = 40%
Fig 13 b: Mode =If Lighter, Opacity = 100%
Fig 13 c: Mode = Saturation, Opacity = 30%
Fig 13 d: Mode = Screen, Opacity = 90%
| |
Fig
13e
|
|
| Other
variations:
(Hints
to obtain a white backgrounded object and other variations)
1. Fill the background with white, or
2. Convert the existing background into an object then create a
new white-filled background.
3. Play around with the Merge Modes of all objects
4. Shift the positions of overlying objects by several pixels
5. Experiment with drop shadows/white glows around the objects.
SERIES
MENU: <-PREV | NEXT->
Intro | Easy
Fire | Complex Fire # 1 | Complex
Fire # 2 -|||||- Easy
Ice | Complex Ice # 1 | Complex
Ice # 2 | End
|
|