Part 3. Tools and Effects

1. Red Eye Removal.
Red eye removal replaces the red eye in a photograph with your selected colour. Although relatively minor, you would be surprised how many requests Corel received for this feature!.

The Red Eye Removal Tool is found in the Menu under Effects > Color Transform > Red Eye Removal. To use the effect you must first create a suitable mask around the iris of the eye to be treated. You can use the Oval mask Tool in the mask flyout to create the basic circle mask and then shape it with the mask brush. I found that feathering the mask slightly (2-5 pixels depending on the size of the eye/image) improved the job. You can also choose any colour you like!


2. Smart Blur.
Smart blur ( Effects > Blur > Smart Blur ) lets you create images with sharp edges and blurred contents, and gives you more control over the degree to which images are blurred. This works really well.

Many others I have spoken too believe that this new Smart Blur effect is possibly one of the best effects Corel has ever added to Photo-Paint. It can almost magically remove grain from photos and moiré from scans. It can instantly give a fantastic softness to skin tones, especially in portraits while maintaining sharpness in facial features such as eyes, mouth and hair.


3. Drop Shadow.
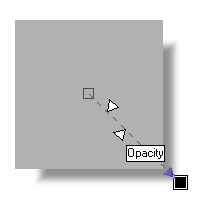
The Interactive Drop shadow tool allows you to control the opacity and feathering of a drop shadow using sliders right on the drop shadow controls.


4. Copy Drop Shadow Properties.
You can now easily copy the drop shadow from one object to another. PP10 sports a new icon at the end of the Drop Shadow Property Bar that becomes active when any object in your image contains a drop shadow. To use it, first select the object you wish to have a shadow copied TO, click the icon, then point to the shadow you'd like to copy. You need to click on the object's shadow, not the object itself.


5. Masking Tool Changes.
The shape properties of the masks have been adapted so that masks can be moved more freely within a document.

  • Masks will no longer automatically clip as soon as they are moved out of the document space.

  • Masks can also be dragged and dropped between open documents in the Photo-paint workspace. This means that you no longer have to save a mask to a file in order to use it in another image, now you just drag or CTRL-drag it onto the new image! This is one feature I use a lot now.


6. Channel Mixer.
The new Channel mixer lets you blend colour channels by percentages to give you more colour balance control.

A number of people have commented to me previously that they could not change the overall colour of an object as they could in Corel Draw, where you just left or right click on a palette swatch to change the fill or outline colours. The main reason for this is simple and when thought about becomes quite obvious - Draw is a vector drawing program while Photo-paint is a bitmap editing program and there is a lot of ocean between them. If one could simple press a palette colour swatch to change the fill colour of an object in Photo-Paint the result, in most cases would be disastrous. Imagine that the intricate bitmap you've been working on for several hours suddenly loses all detail and becomes one solid colour!.

So, you really don't want such a feature in a bitmap editing program. However you certainly CAN change the overall hue of an object or the entire image without losing detail. The new Channel Mixer available under the Image > Adjust > Channel Mixer menu.

It is certainly not as simple to use as say, the Hue Adjuster (under the Image > Adjust > Color Hue menu), but it gives the user much greater control, and, once you understand more about colour channels, is far superior.


What's New in Photo-Paint 10 - PART 3

Copyright © 2001, Visionary Voyager Corporation Pty Ltd. All rights reserved.