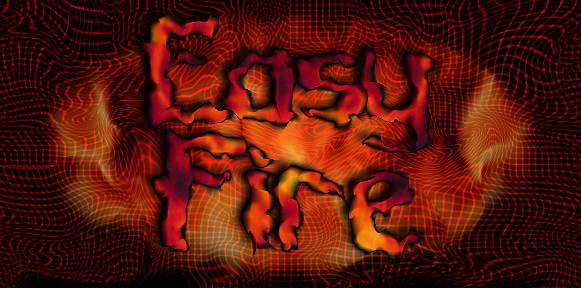
Fig
1 |
1.
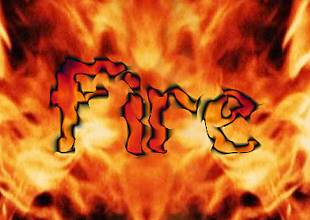
Use the image shown here as the basis for your composition. Click
on the image here to open the larger version, right-click on the
larger version to download it and save it your hard drive, the use
your browser's BACK button to return here. (Fig 1)
2.
Open the image in Photo-Paint.

The image opens as the Background object.
|

Fig
2 |
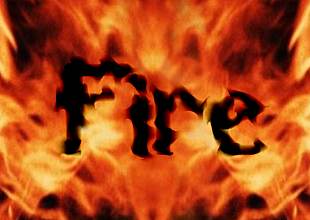
3.
Create some black text.
Change the paint colour to black first, the create the text.
I used a font called Cararway at 150 points.
Centre the image
Object > Arrange > Align and Distribute,
To Center of Document , or 
(Fig 2)
|
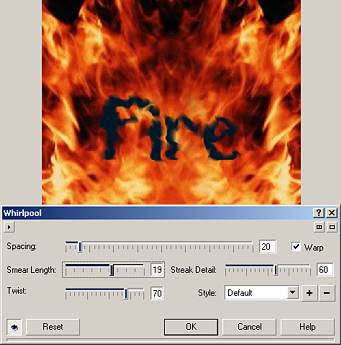
Fig
3 |
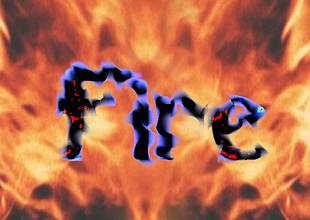
4.
With the text object selected,
apply a Whirlwind effect
Effects
> Distort > Whirlwind.

In
the Whirlwind dialogue box
click the Reset button
then change the:
Smear length = 19.
Press OK to apply the effect.
(Fig 3)
|
| 
Fig
4
|
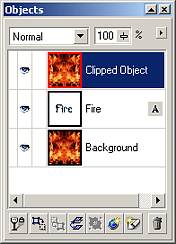
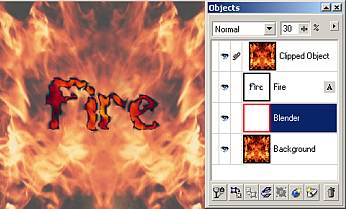
5.
Select the background object
and duplicate it (CTRL+D).
Using the Object Docker,
move the duplicate fire object
so that it is above the Fire text object.
Rename it ‘Clipped Object’
by double-clicking on the object’s name
in the Object Docker
(Fig 4).
|

Fig
5 |
6.
Clip the duplicated object to the text below it
by clicking in the clip object column
for the topmost object in the Object Docker
(Fig 5)
|
Fig
6 |
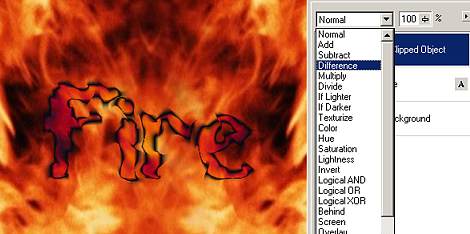
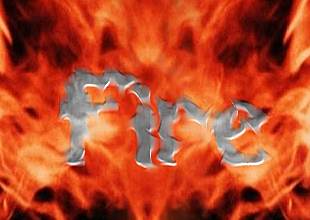
7.
Change the merge mode
of the Clipped Object to:
Difference
(Fig 6).
|
Fig
7
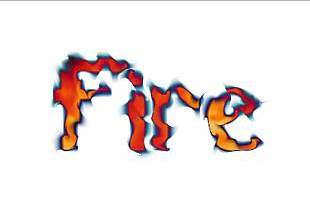
Fig 8
|
8.
Change the Fill Colour to White
(left-click on the white colour swatch on the Palette).
9.
Create a new object
Object > Create > New Object,
or 
and drag it to below the Fire text object
in the Object Docker and
change its name to ‘Blender’. (Fig 7)
Make sure this object is selected
then fill it with white using the Fill Tool. 
(Fig 8)
|
Fig
9 |
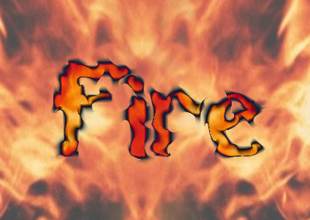
10.
Using
the opacity slider
in the Object Docker,
change the opacity of the Blender object to 30%.
Save your composition as a CPT file so you can reedit it later,
and you can also use EXPORT ((File > Export, or )
to save the file in a different (combined) image format without
losing your separated objects and merge modes. (Fig 9).
Note:
Because the Clipped Object is clipped to the fire text object, it
can be moved around the image with interesting results.
Select the Object Picke tool then choose the the fire text object
and drag it around the image - Cool! |
Fig
8a |
A.
Blender object at 100% opacity
and Normal merge mode
(Fig
8a)
|
Fig
8b
|
B.
Blender
object at 30% opacity and Add merge mode
(Fig
8b)
|
Fig
8c |
C.
Blender object 30%,
Overlay merge mode
(Fig 8c)
|
Fig
8c |
D.
Blender object visibility
OFF, Clipped object 100%, Subtract merge mode.
(Fig
8d)
|
Fig
8c |
E.
Blender object 21%
/ Hard Light mode, Clipped Object 100% / Divide mode, Fire text
object 100% / Color Burn mode.
(Fig
8e)
|
Fig
8c |
F.
Blender object, 30%
/ Hue mode, Fire text object 100% / Screen mode, Clipped object
100% / Texturize mode, white drop shadow added to the Fire text
object.
(Fig
8f)
|