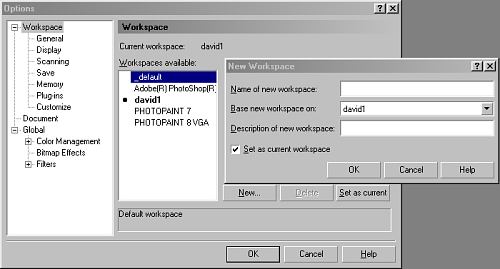
header-t
header-l  Step 1
 Intro
 Step 1
 Step 2
 Step 3
 Step 4
 Step 5
 Step 6
 end
v-line

Step 1: Creating a new Workspace

As installed, Photo-Paint 8 does not display the History list icon in the standard Toolbar; you must add it in. As I sometimes use another person's computer and am conscious of the fact that they may have taken great care to set their system up just the way they want it, I will firstly create a new Photo-Paint Workspace Profile to which I will then apply Toolbar changes.

Oddly, in order to add icons to a Toolbar, an image must first be opened. Thus, after starting the program, click New Image and create a small (e.g. 100x100 pixel RGB) image. Try making changes to the Customise option (Step 2) without first having an image open and you will see what I mean.

  • To make a new Workspace profile, click Tools/Options on the menu bar to open the Options dialog and then make sure you have Workspace selected in the left hand pane.
     
  • Click the New... button to bring up the New Workspace secondary dialog box (Figure 1).
     
  • Type a name into the Name of new Workspace area, check ‘Set as current Workspace' to use this as your default Workspace, then click the OK button. Your new Workspace will then appear highlighted in the list of Workspaces.
     
  • Click OK again on the Options dialog box to close it and to ensure that you will be working within your own custom Workspace before we make changes to it.
fig1

Figure 1. Creating a new Workspace.

PREV

prev next

NEXT

[Intro] [Step 1] [Step 2] [Step 3] [Step 4] [Step 5] [Step 6] [end]

All material, text, graphics and design on this site is Copyright © 1998, 1999 Visionary Voyager Corporation and David Mutch. Permission may be granted for reproduction by emailing me

netscape_now_anim
BuiltByNOF
vv-newani
return