
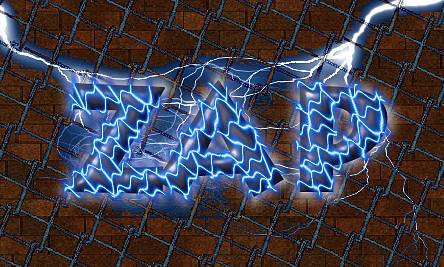
How to Create an Electric Type Effect in Corel Photo-Paint
by David Mutch, September, 2002
How to Create an Electric Type Effect in Corel Photo-Paint
by David Mutch, September, 2002
This Electric Type effect can be created in almost any version of Photo-Paint - the steps used are the same for all versions except for minor changes in menu command names etc. The effect results from the combined use of several masks and so the tutorial shows users how they can combine masks using mask modes.
| PART 1: Create Some
FX Text. |
||
| 1. |
Use your favourite 3D effect on the text - Plastic Texture, The Boss, Glass etc. Avoid Drop Shadows - just use the text only.(Fig 1)
|
|
| PART 2: Create the electric mask.
|
||
| 1. | Switch to Paint on Mask (POM) mode (CTRL+K, or
|
|
| 2. | Fill the entire area with 100% Black (use the Fill Tool
|
|
| 3. |
Press OK. Your image should look like Fig 2. (Note: for thinner text, use a smaller size value in the Stained Glass Effect)
|
|
| 4. |
You can visualise the mask better by viewing it in Mask Overlay Mode
Save this mask as a channel called ‘full mesh’.
|
|
| 5. | Once saved, remove this mask (CTRL+SHIFT+R, or
|
|
| 6. | Select the text object and create a mask from it (CTRL+M, or
|
|
| 7. |
(Fig 4) |
|
| 8. | INVERT this mask then save this mask as a channel called ‘cutter’. This mask will be used to cut the correct shape from the full mesh mask.
|
|
| 9. | Remove this inverted text mask, then load the ‘full mesh’ mask (Mask > Load > full mesh). At this point you might wish to turn on the Mask Overlay so you can see more clearly what happens next.
|
|
| 10. | Select any Mask Tool from the Toolbox to display the Mask Tools Property Bar. Change the mask mode to Subtractive.
|
|
| 11. |
The cutter mask in subtractive mode will remove all parts of the full mesh mask that are outside the 2-pixel expansion area of the original text mask (Fig 5).
|
|
| 12. | Now save this mask as a channel called ‘base’. We need to access this mask several times in the following steps. |
|
| PART 3. Create the
Electric Text Effect. |
||
| 1. | The ‘base' mask should still be loaded. If not, load this mask. Make sure you are in either Normal or Additive mask mode first or else the mask will be loaded inverted if the mode is still Subtractive!. If the mask does load inverted, then simply invert it again.)
|
|
| 2. |
The Text object should be directly below the three new objects. Then, starting from the topmost of the new objects, rename them ‘inner’, ‘middle’ and ‘outer’. These will be our ‘electric’ objects. (Fig 6)
|
|
| 3. |
Change the Fill colour to white, (Fig 7 Note - Mask Overlay is turned ON in this image).
|
|
| 4. | Select the ‘middle’ object.
|
|
| 5. | Feather the mask outside by 4 pixels.
|
|
| 6. | Change the Fill colour to 0, 165, 254 (RGB),
|
|
| 7. |
Feather the mask again but this time outward by 8 pixels. Change the fill colour to 0, 0, 154 (RGB). Remove the mask (CTRL+SHIFT+R, or
|
|
| 8. | Using the Object Docker and your SHIFT or CTRL key, select all three
electric objects. A single new combined object will replace the previous 3.
|
|
| 9. |
It is probably best to use a low Period value (e.g. 4), and a very low Amplitude (e.g. 2), and NO Perpendicular value. Change the Angle if you wish and check Distort Ripple for a jagged effect if you wish (not done here). Press OK when you are satisfied with your distortion. Fig 9.
|
|
| 10. | You can apply a light Displacement Effect to make the electricity more jagged if you wish (as in the title graphics for this tutorial). Also, The effect can be made more striking with the addition of: (Fig 10 - below) |
|
 |
||
| T e
x t E f f e c t s # 3 M
e n u : <- PREVIOUS || NEXT ->
|
||||||||||||
|
||||||||||||
 Create
a new document with a white background, then create some fancy text using
your favourite font in a dark colour. Use of a large font size is recommended,
but the actual font and size are not important. Black and dark greys may
be the best here.
Create
a new document with a white background, then create some fancy text using
your favourite font in a dark colour. Use of a large font size is recommended,
but the actual font and size are not important. Black and dark greys may
be the best here. Apply
a Stained Glass Effect
Apply
a Stained Glass Effect Toggle
POM mode off
Toggle
POM mode off  EXPAND
the text mask by 2 pixels
EXPAND
the text mask by 2 pixels Now
load the cutter mask.
Now
load the cutter mask. Create
3 new objects (use the icon on the Objects Docker,
Create
3 new objects (use the icon on the Objects Docker,  Select
the inner object.
Select
the inner object.  Select
the ‘outer’ object.
Select
the ‘outer’ object. Add
a Ripple Effect (Effects > Distort > Ripple).
Add
a Ripple Effect (Effects > Distort > Ripple).